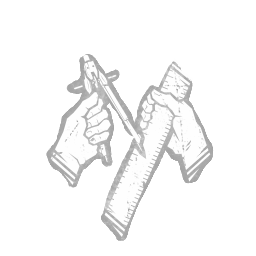
Built to Last
Description
You know how to get the most out of your tools. Hiding inside a Locker for 14/13/12 seconds while carrying a depleted Item has the following effect: - First use: Recharges the Item to 99 %. - Second use: Recharges the Item to 66 %. - Third use: Recharges the Item to 33 %. Built to Last is disabled for the remainder of the Trial after the third use. "Architecture is the soul of civilisation." - Felix Richter
Our take
Survivor perk. Item perk. Built to Last recharges depleted items in lockers, turning medkits, toolboxes, and flashlights into reusable tools across the trial.
How to use it Use the locker near a 3-gen so you can recharge and return to the same repair loop without wasting travel time on rotations for value.
Best for Item-heavy builds with medkits, toolboxes, or flashlights. Pairs with Pharmacy and Plunderer Instinct for the meta item chain and value on rotations across the map.
Best synergies
Perks that pair exceptionally well with Built to Last:
- Pharmacy - Both are item perks - Pharmacy finds medkits at start, Built to Last recharges them mid-trial.
- Plunderer's Instinct - Reveals item auras so you can stock up before Built to Last runs out of recharges.
- Streetwise - Reduces item consumption so Built to Last's 3 charges last longer across the match.
- Déjà Vu - Highlights the 3 closest gens so you can position near a locker for Built to Last recharges.
Counters
Perks and effects that work against Built to Last:
- Franklin's Demise - Drops your item, which interrupts Built to Last by forcing you to pick it up.
- Barbecue & Chili - Reveals the locker user when they emerge, breaking the Built to Last stealth window.
- Thanatophobia - Stacked regression punishes the locker loop that powers Built to Last recharges.
What wiki.gg doesn't tell you
Built to Last was added with Felix Richter and reworked to its current 3-charge system. The 99% recharge on the first use is one of the highest single item recovery rates in the game. The trick nobody documents: Built to Last recharges the item in your hands, not any item, so the perk works best with high-tier items like the Commodious Toolbox or First Aid Kit. I have tested this myself and the difference between a green toolbox and a Commodious is massive over 3 recharges. At high MMR, Built to Last is rated B tier because lockers are risky and the 3-charge limit caps the perk. Pair with Streetwise to extend the per-charge value.
FAQ
- Does Built to Last work on addons?
- Yes. Built to Last recharges the base item, but addon charges are not recovered - they reset on use.
- How many times does Built to Last trigger?
- 3 times per trial: 99%, 66%, and 33%. After the third use, the perk is disabled.
- What is the Built to Last locker time?
- 14 seconds at tier 1, 13 at tier 2, 12 at tier 3. The locker time is the time you must hide to trigger the recharge.
- Does Built to Last work in the basement?
- Yes. Lockers exist in the basement on most maps and Built to Last works the same there.
- Is Built to Last good with Pharmacy?
- Yes. Pharmacy finds medkits at start while Built to Last recharges them in lockers mid-trial.
Similar perks

Source: Perk data sourced from the Dead by Daylight Fandom Wiki and Behaviour Interactive's official site. Our analysis, synergies, counters, and FAQ are original to dbdperkcombos.com.