Why the Final Week Matters
The September 2026 run of 2v8 is winding down. The event opened on September 8 and the database server will roll the event window shut at 00:00 UTC on September 29, 2026. As of this writing on September 23, players have six calendar days remaining, which is roughly 80-90 hours of grind time for someone who logs in daily. That sounds like a lot, but the practical deadline is tighter than it looks: quest tiers require completed matches, not queued matches, and many tier 3 conditions require specific Killers, specific maps, or specific Survivor classes to be present in the match before the progress ticks. A player who logs in cold on September 27 expecting to clean up three leftover rewards will usually discover that the conditions are harder than they look and end the event missing one or two cosmetics.
The first reason this week is urgent is that Behaviour Interactive has not committed to bringing the Xenomorph back to 2v8. The September 2026 iteration is the first time the Xenomorph has appeared in the 2v8 roster, and past precedent is mixed: The Executioner appeared once and was absent from the next run, while The Ghost Face appeared twice and was absent from a third. There is no guarantee that the November 2026 iteration (if it runs) will include the Xenomorph. Players who want to practice the Xenomorph in 2v8 before the next rotation should treat this week as the only window to do so.
The second reason is that Quest progress expires on September 29. The Quest tracking system in the September 2026 event is keyed to the event window; Quest progress resets at the end of the event and any unfinished tiers become unobtainable. As we covered in the September 11 2v8 general guide, the Quest system is split into three tiers per reward: tier 1 is 1 match, tier 2 is 5 matches, and tier 3 is 10 matches with a specific condition. Tier 1 can be cleared in a single sitting. Tier 2 takes a focused afternoon. Tier 3 is what kills you: 10 matches with conditions like "Survivor team escapes on Nostromo Wreckage" can easily eat a whole weekend, and if you start them on September 27, you will not finish.
The third reason is that the rewards are exclusive. The 12 Alien-themed rewards in this iteration are Badges, Banners, and Charms themed around the Xenomorph, Facehugger, Chestburster, and Nostromo spaceship. Past 2v8 iterations have retroactively made some rewards available through the Rift or Archive, but most have stayed exclusive. Players who miss the window typically have to wait 6-12 months for a re-release, and some never come back. The Nostromo Banner and the Acid Bath Charm in particular are designed to be missable.
The fourth reason is the meta reason: 2v8's permanence hinges on this run's data. As we noted in the original 2v8 guide, Behaviour Interactive has stated that the September 2026 data will determine whether 2v8 becomes a permanent game mode or stays a quarterly event. Strong engagement this week translates into more 2v8 runs in 2027. Players who skip the final week because they think "we got this" are reducing the engagement signal and potentially killing the mode's permanent status. Every match this week matters beyond your own account.
Captain Pairing Tier List
The Xenomorph is one of eight Killers in the September 2026 2v8 roster. In 2v8, two Killers play on the same team and share a single terror radius pool. The pairing you choose determines the entire match: which Survivor groups get pressured, which gens get stalled, and which Survivors get sacrificed first. Below is the rank-ordered tier list for pairing the Xenomorph with the other seven 2v8 Captains.
| Rank | Partner | Role | Strength | Weakness |
|---|---|---|---|---|
| S | Nurse | Global blink pressure | Can cross-map chain blinks to shut down split-push; pairs with Xenomorph tail chase for cleanup | Mapping-dependent; weak on tight Nostromo Wreckage interior |
| S | Hillbilly | Map mobility + instadown | Chainsaw mobility lets Hillbilly rotate to any gen in seconds; Xenomorph follows up with tail chases | Less effective on small interior maps where chainsaw paths are short |
| A | Trapper | Zone control + setup | Bear traps lock down high-traffic gens; Xenomorph patrols the trapped zones | Trap management eats clock; weak if Survivors clean traps quickly |
| A | Huntress | Ranged instadown | Hatchet throws from across the map; Xenomorph covers the close-range chases | Reload downtime; weak against coordinated groups that dodge line of sight |
| B | Doctor | Madness + illusion tracking | Static blast forces Survivors out of position; Xenomorph catches them in the open | Lower kill pressure in 2v8; Survivors can break Madness with an action |
| B | Executioner | Trail punishment | 10% faster trail charge from the September 2026 buff; denies pallets | Trail cooldown is long; weak on open maps without corridor choke |
| C | Ghost Face | Stalk + Exposed | Stalk meter fills 15% faster in this build; can stalk then down | Revealed Survivors break Exposed; weak if Survivors split-push to deny the stalk line |
| C | Wraith | Uncloak burst chase | Uncloak speed boost catches Survivors off gens; Xenomorph follows | Bell warns of Wraith approach; weakest map pressure of the eight |
The S-tier pairings (Nurse and Hillbilly) are the meta this week. The Xenomorph plus Nurse pairing is the strongest on mid-size maps like MacMillan Estate or Hawkins National Laboratory because the Nurse can blink across the map to stop split-push and the Xenomorph cleans up the chase. The Xenomorph plus Hillbilly pairing is strongest on larger maps because the Hillbilly's chainsaw mobility lets him rotate faster than any other Captain. A-tier pairings (Trapper and Huntress) are solid all-round picks and the right choice if both S-tier pairings are taken. B-tier and C-tier are niche picks that work on specific maps but should not be your default. We will dig into "when to choose which" later in this post.
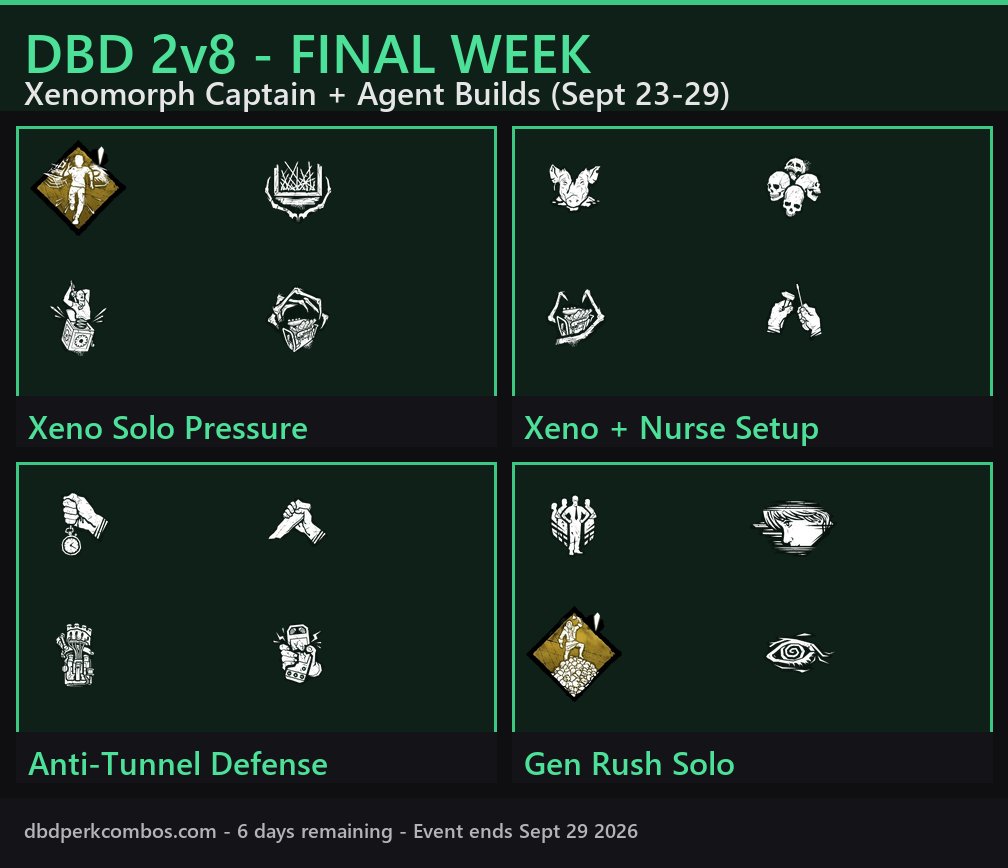
The 5 Captain (Killer) Builds
Below are 5 Captain builds tuned for the Xenomorph in 2v8. Each build has 4 perks selected for a specific role. The Xenomorph's unique perks (Brutality, Hunter's Instinct, Alien Instinct) are usable in 2v8 but do not appear in these slots because the meta-standard perks below outperform them in the final-week grind. Perk names link to the full perk pages.
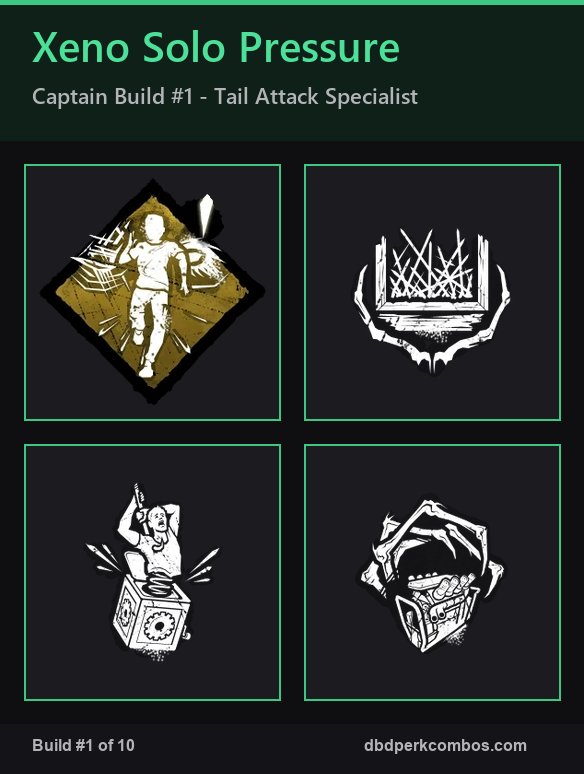
Captain Build #1 - Xenomorph Solo Pressure
This is the lone-Xenomorph build: when your Captain partner is weak or disconnected and you need to carry the match yourself. The build converts the Xenomorph's 2v8 movement speed buff into maximum chase pressure and uses Infectious Fright to chain downs across the map.
Perks
- Lethal Pursuer - reveals Survivor auras at trial start so you can pick the closest chase target immediately
- Infectious Fright - downed Survivors scream and reveal the auras of all Survivors within 32 meters, letting you chain downs without traveling
- Bamboozle - vault speed boost and the ability to block one window per match, denying Survivors the standard 2v8 pallet loops
- Pop Goes the Weasel - kicking a gen after hooking a Survivor loses 25% of its progress, your secondary objective when not chasing
How to play it
Open the match by reading the closest Survivor aura from Lethal Pursuer and committing to a chase before the first gen reaches 50% progress. The Xenomorph tail attack applies Hindered, which slows the Survivor down and lets you close distance even on open maps. Use Bamboozle's window block on the Survivor shack window on most maps; this is the universal 2v8 choke point and shutting it down removes the Survivor's best escape option. Save Pop Goes the Weasel for the moment you down a Survivor near a high-progress gen; the 25% regression will force the Survivors off the gen for a hook rotation.
The build wins matches through chain downs. Infectious Fright is the keystone: every time you down a Survivor, every other Survivor within 32 meters has their aura revealed for 4 seconds. In the 8-Survivor chaos of 2v8, this means you will frequently start a second chase before the first Survivor hits the ground. The combo with the Xenomorph tail attack is that the Hindered status effect from the tail keeps downed Survivors crawling slowly to the hook, giving you time to start a new chase before the rescue timer expires. Run this build when your Captain partner is weak, when you want to maximize match speed, or when the Survivor team is running a split-push strategy that the standard chase meta cannot answer.
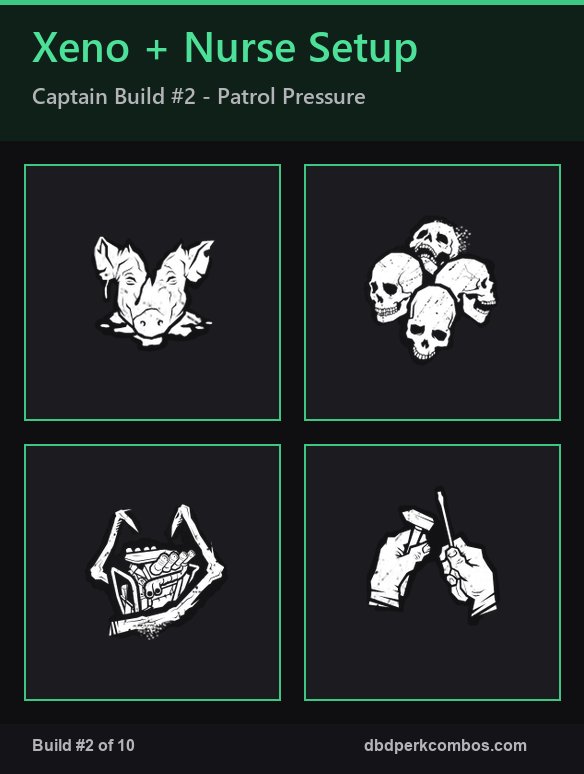
Captain Build #2 - Xenomorph plus Nurse Setup
This is the meta S-tier build: Xenomorph plays the secondary patrol and chase role while the Nurse plays the global blink pressure role. The perk picks are tuned to a partnership playstyle, not a solo carry, and the build is designed to maximize nurse-led chain downs.
Perks
- Sloppy Butcher - Survivors lose blood on hit and Survivors healing from the injured state leave pools of blood for 30 seconds, easy Nurse tracking
- Thanatophobia - each injured Survivor applies a 4% gen slowdown, stacking up to 32% with all 8 injured
- Hex: Ruin - the standard gen regression totem, slows every gen by 50% until cleansed
- Tinkerer - applies Undetectable for 8 seconds after a gen completes, letting the Xenomorph cross the map to start a new chase
How to play it
Coordinate the opening with your Captain partner. The Nurse teleports to the closest gen using a chain blink to interrupt the Survivor on it. While the Nurse is in chase, the Xenomorph patrols a different quadrant and intercepts Survivors trying to swap gens. The perk Sloppy Butcher makes the chase easier because every hit leaves a blood trail that the Nurse can follow across map segments. Thanatophobia stacks with the 8-Survivor pressure: if the Nurse gets 2 quick downs, the gen slowdown hits 8-12%, which is enough to buy the Xenomorph extra chase time.
The keystone perk in this build is Tinkerer. Every time a Survivor completes a gen, the Xenomorph gains Undetectable for 8 seconds, which means the terror radius disappears. Survivors who are not in a chase cannot tell where the Xenomorph is, and the Undetectable status gives the Xenomorph free chase starts. Pair the Undetectable with the Xenomorph's acidic blood pool: drop the pool at a generator's location as the Survivors rotate off, and the pool lingers for 15 seconds blocking the next Survivor from reusing the gen. Run this build on mid-size maps where the Nurse can blink freely; on tiny maps like Nostromo Wreckage interior the Nurse is weaker and the build's value drops.
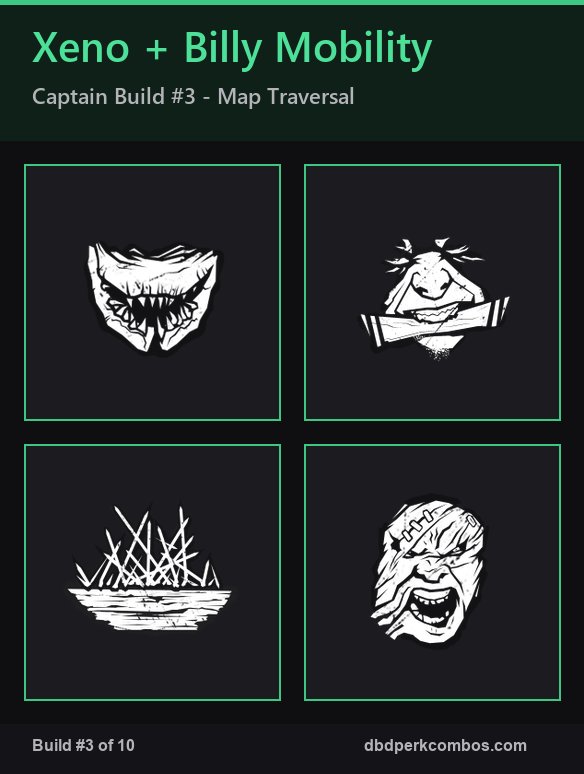
Captain Build #3 - Xenomorph plus Hillbilly Mobility
Hillbilly is the S-tier mobility pairing for the Xenomorph. This build is tuned for open maps with long sight lines, where the Hillbilly's chainsaw can carry the Xenomorph's chase power across multiple gens in rapid rotation. Perk picks lean hard into map-wide pressure.
Perks
- Agitation - carrying a Survivor applies +6% movement speed and prevents the Survivor from struggling off the hook, letting you carry to distant hooks
- Monitor and Abuse - the Xenomorph's terror radius is reduced by 8 meters when not in chase, making it harder to pinpoint on open maps
- Spirit Fury - pallet stun windows are removed after breaking 4 pallets total; Xenomorph pallet loops are shorter after the 4th break
- Enduring - pallet stun recovery is reduced by 40%, letting the Xenomorph stay in chase through a stun attempt
How to play it
This is the open-map build. The Hillbilly uses his chainsaw to rotate across the map in seconds; the Xenomorph plays the chase half of the rotation. When a Survivor breaks line of sight, the Hillbilly chainsaws to cut them off and the Xenomorph applies the tail attack Hindered to slow the Survivor. The two Killers trade chase cleanly without overlap. Agitation is the carry perk: pick up a downed Survivor, hold forward, and carry them to a far hook in seconds. Even with Thanatophobia-level Survivors healing the unhooked teammate, the carry speed means the rescue window is tight.
The Spirit Fury plus Enduring combo is the chase killer. Both perks stack: Spirit Fury removes pallet stun windows after 4 pallets broken, and Enduring shortens any stun recovery. By the time the Xenomorph has broken 4 pallets, the Survivor has no good pallet to run to and the chase ends quickly. Monitor and Abuse is the keystone for this build: a smaller terror radius means the Xenomorph can chase a Survivor from a closer starting position, and Survivors who are not paying attention to the heartbeat will be caught in chase within seconds. Run this build on MacMillan Estate, Hawkins National Laboratory, or any map with 24-meter+ gen spacing.
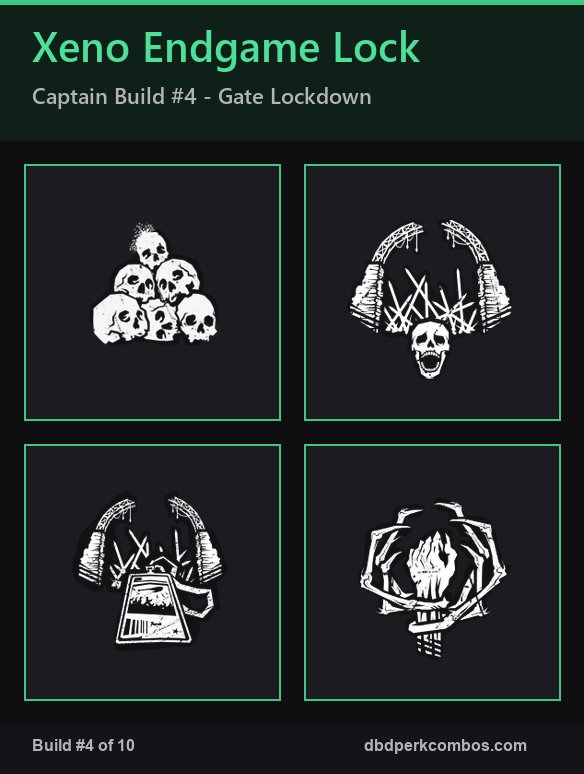
Captain Build #4 - Xenomorph Endgame Lockdown
Endgame lockdown is the build you run when the Survivor team is running an unhook-heavy composition. The build punishes the rescue chain by closing the exit gates the moment they are powered. This is the right build for the last 3-4 gens of a match when you are trying to convert a Survivor lead into a 4K.
Perks
- Hex: No One Escapes Death - the exit gate slowdown totem, activates once the final gen is done and slows the open by 50%
- Blood Warden - once the exit gates are powered, hooking a Survivor blocks the gate they are nearest to for 30 seconds
- No Way Out - each unique Survivor hook after the end-game collapse applies Exposed for the remainder of the match
- Terminus - kicking a recently regressed gen applies +20% movement speed for 30 seconds, faster chase after a kick
How to play it
Save the endgame perks for the last 60 seconds of the match. Hex: No One Escapes Death does not activate until the final gen is finished, so the perk is wasted if you chase early. Blood Warden is the same: the perk does nothing until the gates are powered. The strategy is to use the first 4-5 minutes of the match on standard chase and gen stall, then save the endgame perks for the final minute. When the final gen pops, NOED activates and Blood Warden enables, and the Survivor team faces a 50% slower exit gate plus a Survivor-specific gate block.
The combo with No Way Out is the chaser. Any Survivor unhooked within the last 60 seconds is Exposed, meaning one basic attack downs them. The Xenomorph's +5% 2v8 movement speed plus the Exposed effect means a single hook rescue in the endgame can chain 3+ downs. Terminus is the chase speed boost: kick a gen at 0% and get a free +20% movement speed buff for 30 seconds, which lets the Xenomorph close distance to a rescuing Survivor that would otherwise escape. Run this build when the Survivor team is running a "save everyone" composition with multiple Survivors running Borrowed Time.
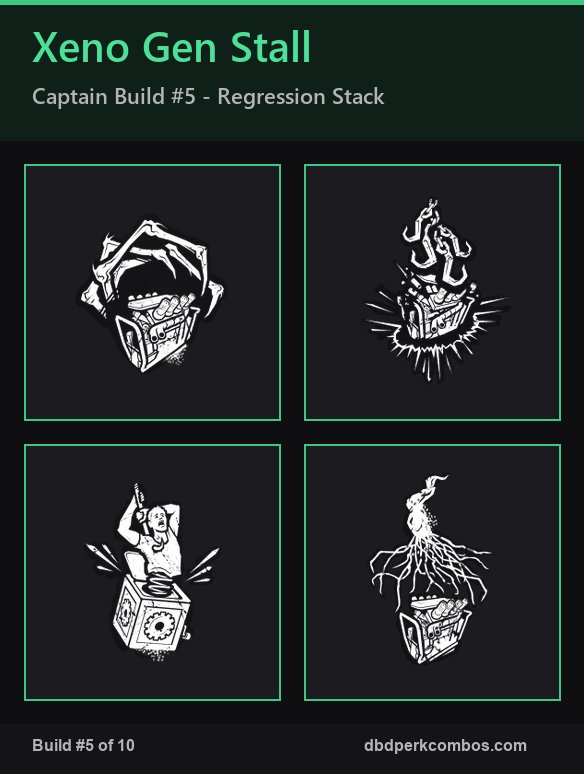
Captain Build #5 - Xenomorph Gen Stall
Gen stall is the build you run when the Survivor team has stronger chases than you do and you need to slow the gen count instead of relying on chase. The build uses the strongest regression perks in the game plus the Xenomorph's patrol pressure to extend matches past the 5-minute mark.
Perks
- Corrupt Intervention - the 3 closest gens to the Killer spawn are blocked for 120 seconds at the start of the trial, forcing Survivors to spread
- Scourge Hook: Pain Resonance - at the start of the trial 4 random hooks are Scourge Hooks; hooking a Survivor on one triggers a 25% gen explosion
- Pop Goes the Weasel - hooking a Survivor lets you kick a gen for 25% instant regression
- Eruption - kicking a gen sends the gen into a 15-second blocked state and applies Hindered to any Survivor working on it
How to play it
Open with Corrupt Intervention doing the work for you: the 3 nearest gens are blocked for 120 seconds, forcing the Survivor team to spread out and start a gen far from your spawn. The Xenomorph patrols the 3 blocked gens, intercepting any Survivor who returns to them early. Meanwhile the 5 gens on the far side of the map start ticking, but the Killer team has 2 minutes of uncontested time to set up Scourge Hook: Pain Resonance hook positions. The first time you hook a Survivor on a Scourge Hook, the farthest gen explodes down 25%, immediately canceling 1.5 Survivors of work.
The chase half of the build is Pop Goes the Weasel + Eruption. After every hook, kick the closest gen for 25% regression plus 15 seconds of blocker. The Survivor team will lose 2-3 gens of progress across the match even if the Killer team has weak chases. The build wins by extending the match until the endgame lockdown perks activate. Run this build when the Survivor team is heavily invested in chase and you are willing to play a longer match. Pair with a Hunt Captain (Trapper or Doctor) for maximum stall.
The 5 Agent (Survivor) Builds
Below are 5 Agent (Survivor) builds tuned for the September 2026 2v8 grind. Each build has 4 perks and a playstyle. The builds cover the major Survivor roles: anti-tunnel, gen rush, healing, aura reading, and endgame. Perk names link to the full perk pages.
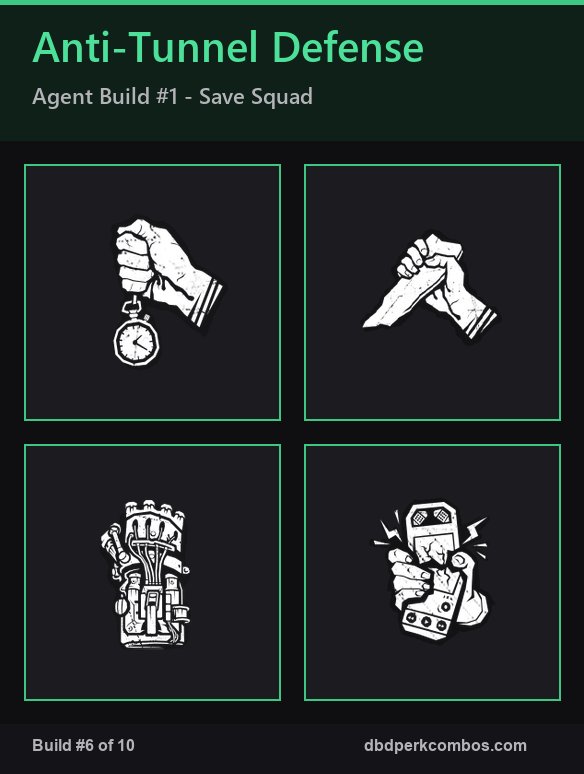
Agent Build #1 - Anti-Tunnel Defense
The classic anti-tunnel build: load every slot with perks that punish the Killer for tunneling you off the hook. This is the right build when the Killer team includes the Xenomorph plus a strong chase Captain like the Nurse or the Hillbilly.
Perks
- Borrowed Time - you have the Endurance status effect for 10 seconds after an unhook, blocking one hit
- Decisive Strike - you have the ability to stun the Killer when grabbed within 60 seconds of an unhook
- Mettle of Man - you gain the powerful Obfuscation effect after healing 2 Survivors while injured and surviving a hit
- Off the Record - the Enduring effect plus a 60-second aura block after unhook, making you hard to track
How to play it
This build shines in solo queue 2v8 because it does not require teammate coordination. After an unhook, you have Borrowed Time for 10 seconds, Decisive Strike for 60 seconds, and Off the Record for 60 seconds. The triple-tunnel-defense means the Killer cannot guarantee a quick re-down. The playstyle is unhook-and-run: take the unhook, run to a far gen, and refuse to heal until the Killer commits to a different Survivor.
The goal of the build is forcing the Killer to switch targets. With Mettle of Man active, you have a 60-second Broken status immunity plus an aura block, which is enough time to finish a generator after the third hit. Run this build when the Killer team is clearly targeting one Survivor at a time (tunneling), when you are playing solo and cannot coordinate unhooks, or when the Killer team has a strong chase Captain that can punish careless positioning.
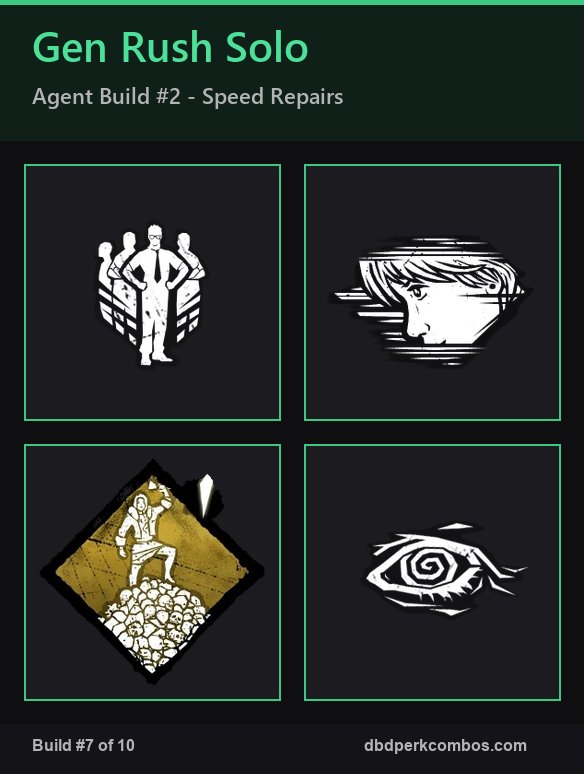
Agent Build #2 - Gen Rush Solo
The solo-queue generator build: load every slot with perks that speed up generators and keep you on them. This is the right build when the Killer team has weak chase pressure or when you need to maximize quest progress in minimum matches.
Perks
- Prove Thyself - +1% gen speed per Survivor working on the same gen within 4 meters, stacking to +15% with all 4
- Hyperfocus - great skill checks on the gen you are working on grant a stacking +4% repair speed bonus up to +20%
- Fast Track - each great skill check on a generator grants one Gen Progress token, up to 20 (gen instantly completes at 20)
- Deja Vu - 3 gens are highlighted with auras at trial start, allowing you to recognize the most-progressed gens and prioritize them
How to play it
The build plays around coordinated gen pushes. Find a teammate working on a gen, run to them, and start working on the same gen. Prove Thyself activates at +2% per Survivor, so 4 Survivors on one gen means +15% repair speed. Pair with Deja Vu at trial start: the 3 highlighted gens tell you which gens are most progressed, so you can prioritize the ones closest to completion rather than the ones at 0%.
The keystone is Hyperfocus. Hit a great skill check on the gen you are working on, and you get +4% repair speed. Stack five great checks and you are at +20% repair speed on that gen alone, which is the equivalent of an additional Survivor working beside you. Fast Track is the final-stretch killer: 20 great checks wins the gen outright. Run this build in solo queue when you have a coordinated Survivor team that pushes gens together, and avoid the build when the Killer team is running high-pressure chases that force you off gens every 30 seconds.
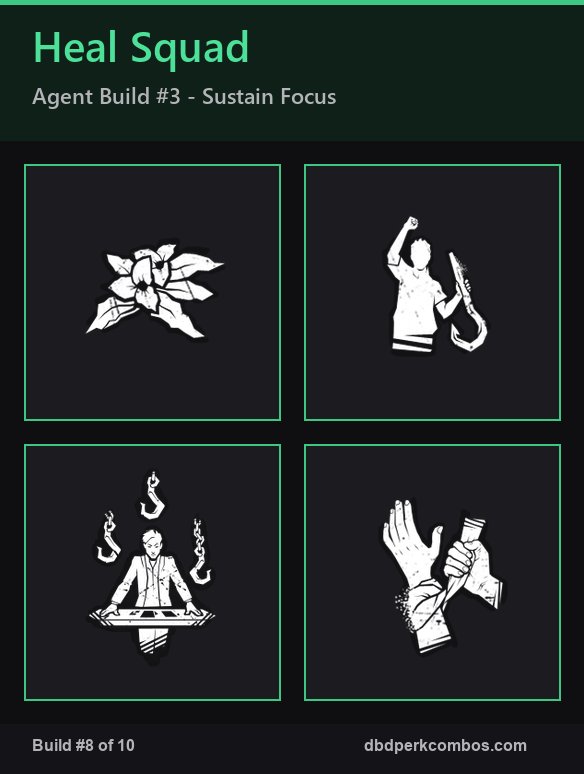
Agent Build #3 - Heal Squad
The heal-focused build: every perk slot supports either self-healing or teammate healing. This is the right build when your team composition includes multiple medkit users and you want to maximize the team's total healing throughput.
Perks
- Botany Knowledge - healing speed +30% and the Survivor you heal loses no blood, plus you heal yourself +25% faster
- We'll Make It - after an unhook you have +100% healing speed for 30 seconds, healing teammates back to full in seconds
- Desperate Measures - the more injured Survivors there are, the faster you heal, scaling from +10% with one injured to +40% with all four
- Self-Care - self-heal at 80% the speed of normal healing without requiring a medkit, the standard heal-yourself perk
How to play it
This build is the heal engine of the team. After every unhook, your We'll Make It is active for 30 seconds: heal the freshly unhooked Survivor from injured to full in seconds, then heal yourself from injured to healthy. The chain is fast enough that the Killer can barely start a new chase before the Survivor you healed is back at full health. Botany Knowledge doubles the heal speed while also protecting the Survivor you heal from blood loss, which means no blood trail for the Killer to follow.
The team-heal side is Desperate Measures. With 4 injured Survivors on the map (a real possibility in 2v8 against 2 Killers), your healing speed is +40% on top of the base value, which is enough to heal a teammate from 0% to 100% in 8 seconds. Self-Care closes the build: when you are injured with no nearby teammate, you can self-heal without a medkit, keeping you on the gen rotation. Run this build when the Killer team is going for chain downs and your team is taking heavy injury damage; the heal output will often win the gen war by raw math.
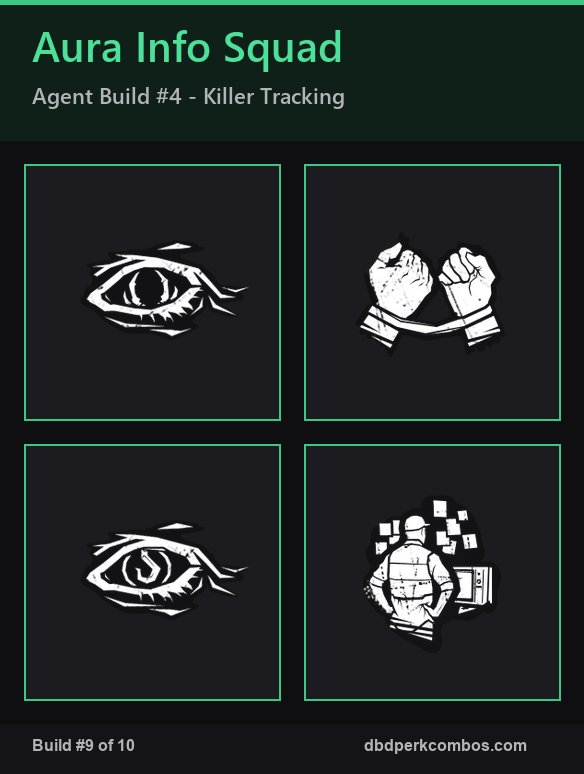
Agent Build #4 - Aura Read and Info
The information build: every perk slot gives you aura read or killer tracking. This is the right build when playing with a coordinated SWF (Survivor-With-Friends) team or when the Survivor Guide Class is in play.
Perks
- Object of Obsession - the Killer's aura is revealed to you whenever you are looking at them, and you reveal your aura in return every 30 seconds
- Bond - you see the auras of all other Survivors within 20 meters, helping you find unhook helpers fast
- Kindred - when you are hooked, all other Survivors see the Killer's aura within 32 meters and you see all Survivor auras
- Detective's Hunch - every time a gen completes, the closest 4 unbroken pallets and 1 hex totem are highlighted for 10 seconds
How to play it
The keystone perk is Object of Obsession. As long as you are looking in the Killer's general direction, you see their aura, and you can plan your rotation to avoid them. The trade-off is that you reveal your own aura every 30 seconds, which means the Killer can also see you. To minimize the trade-off, look at the Killer only when you need the information; when you are on a gen, look away.
The other three perks layer info on top of Object of Obsession. Bond tells you where other Survivors are within 20 meters, which is the closest teammate for an unhook or heal. Kindred is the rescue call: when you go down, every Survivor on the team sees the Killer's location and can coordinate the safest unhook angle. Detective's Hunch finds you the closest broken pallet after every gen completes, so you can pre-rotate to a chase path that has a pallet ready. Run this build when your team uses voice comms and trusts the info, and avoid it in solo queue when nobody will act on the aura reads.
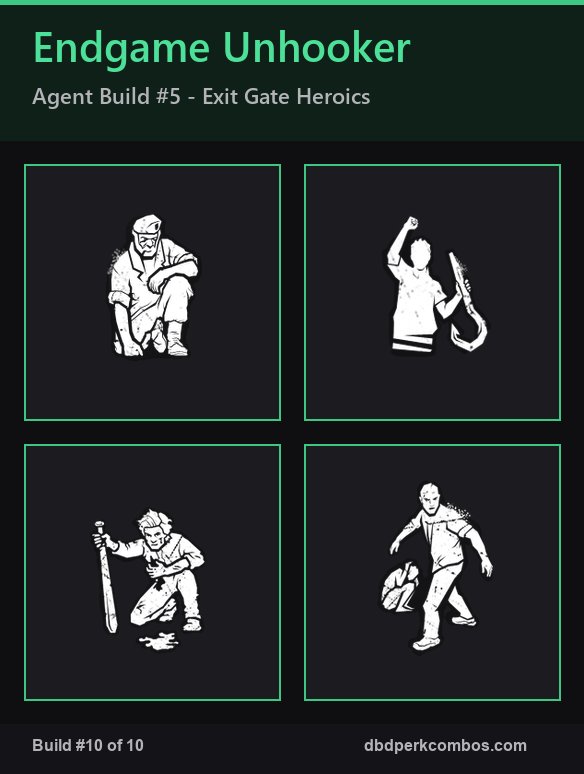
Agent Build #5 - Endgame Unhooker
The endgame unhook build: every perk slot helps you reach an unhook in the endgame. This is the right build for the final minute when the Killer team has the endgame lockdown perks active and you need to save teammates from the hook in Exposed/NOED conditions.
Perks
- Second Wind - after healing a Survivor to full, you gain the Endurance status effect for 30 seconds
- We're Gonna Live Forever - after performing an unhook you gain a 100% bonus to Bloodpoints and stacking healing/recovery speed
- Kindred - when you are hooked, all other Survivors see the Killer's aura within 32 meters and you see all Survivor auras
- No Mither - you are always Broken and your grunts of pain are silent, but you recover from the dying state 100% faster
The flex slot on this build is the third perk: run Kindred in standard queue for aura read at the rescue, swap to Invocation: Weaving Spiders if your team runs totem objectives, or run Self-Care if you want solo queue self-sustain. All three work; the default is Kindred for the Killer aura reveal.
How to play it
Save Second Wind for the endgame: when the Killer team is running NOED or No Way Out, your regular heal will get you Exposed and downed before the unhook. Use Second Wind's Endurance window to absorb the first hit after healing, then go for the unhook and use We're Gonna Live Forever's recovery boost to recover from any incidental damage. The combo of second-wind Endurance plus the heal-survivor build is the right answer to NOED-heavy Killer pairings.
The playstyle is unhook-chaining: after every unhook, immediately look for the next hook, get the rescue, then unhook again. With We're Gonna Live Forever active, every unhook in the chain is a +100% BP payout plus a stacking 25% recovery speed bonus. Run this build when the Killer team is going for maximum sacrifice pressure in the endgame (NOED, Blood Warden, No Way Out) and your team needs someone willing to tank the rescue rotation.
Captain Pairings - When to Choose Which
The tier table above gives you the rankings, but the practical question 2v8 players face every match is "should I pick Xenomorph plus Nurse or Xenomorph plus Hillbilly, and when does the Trapper take priority?" The answer is map-driven and team-driven. Below is the prose explanation for the 8 pairings.
The default pick is Xenomorph plus Nurse. The Nurse's chain blinks can interrupt any Survivor on any gen in seconds, and the Xenomorph's tail chase cleans up any Survivor the Nurse cannot catch. On maps with 24-meter gen spacing (MacMillan Estate, Hawkins National Laboratory), the Nurse can chain 2-3 blinks in a single chase and reach Survivors that the Xenomorph would not catch on its own. The build works because the two Killers cover each other's weaknesses: the Nurse is weak against coordinated pallet loops but the Xenomorph is strong there. The weakness of the pairing is micro-maps like Nostromo Wreckage interior, where the Nurse's blink range exceeds the room size and she wastes blinks on geometry. On Nostromo, swap to a different pairing.
The second-default pick is Xenomorph plus Hillbilly. The Hillbilly's chainsaw mobility is the fastest rotation of any Killer in 2v8, and the Xenomorph's chase power is a strong follow-up after the chainsaw cut. The pairing wins on open maps with long sight lines and strong pallet coverage (Pale Rose, Raccoon City Police Department, Macmillan Estate). The chainsaw lets the Hillbilly pressure Survivors on opposite sides of the map without the 2v8 movement speed penalty, and the Xenomorph's tail Hindered means a Survivor hit by a chainsaw remains an easy chase target. The weakness is on tiny interior maps where the chainsaw has no line to wind up; on those, the pairing falls behind.
The third-default pick is Xenomorph plus Trapper. The Trapper's bear traps create permanent zone control: a trapped gen cannot be safely worked without watching for the trap animation. The Xenomorph patrols the trapped zones and catches any Survivor who tries to disarm. The pairing is strong on small maps (Nostromo, Midwich Elementary School) where the map only has 5-6 gens and the trap density can cover half of them. The weakness is that the Trapper's trap management eats clock: at peak play, the Trapper spends 30-40 seconds per match just on trap drops and resets, and that time is not spent chasing. On large open maps, the trap coverage is too thin to matter.
The Xenomorph plus Huntress pairing is a ranged-instadown combo. The Huntress throws hatchets from across the map, and the Xenomorph chases any Survivor the Huntress tags. The pairing is strong on maps with long sight lines (Raccoon City Police Department corridors, Hawkins National Laboratory), but weak on maps with tight interior geometry where hatchets cannot be aimed (Midwich Elementary School, Nostromo). The pairing is also weak against coordinated groups that dodge line of sight.
The Xenomorph plus Doctor is the niche pick on small maps. The Doctor's static blast forces Survivors out of position with Madness stacks, and the Xenomorph catches them in chase. The pairing is strong on Nostromo and Midwich because the small map forces Survivors into the Doctor's blast range, but weak on open maps where Survivors can spread out and avoid the blast.
The Xenomorph plus Executioner is a niche pick on corridor-heavy maps. The Executioner's trail attack travels in straight lines through pallets and windows, denying the standard 2v8 chokepoints. The Xenomorph follows up on any Survivor the Executioner tags. The pairing is strong on Pale Rose and Hawkins because the corridors favor the trail, but weak on open maps.
The Xenomorph plus Ghost Face is the stalk-and-Exposed pick. The Ghost Face's stalk meter fills 15% faster in this iteration, which gives him a faster Exposed trigger. The Xenomorph chains the Exposed basic attack for instant downs. The pairing is strong when the Survivor team is split-pushing and the Ghost Face can stalk a Survivor from behind a wall, but weak against coordinated groups that spot the Ghost Face and break line of sight.
The Xenomorph plus Wraith is the surprise-chase pick. The Wraith's uncloak speed boost catches Survivors off gens, and the Xenomorph follows up. The pairing has the weakest map pressure of the 8 because the Wraith's chase power is below-average once the bell rings. Only pick this pairing if you have a coordinated Killer team that rotates together.
Map-by-Map Tier List for 2v8
Maps are a hidden variable in 2v8 success. The same Captain pairing will produce different results on different maps. Below is the map-by-map ranking for 2v8 with the Xenomorph.
S-tier map: Nostromo Wreckage. The new map is the strongest in the rotation for Killer pairings because the multi-level interior corridors favor the Xenomorph's acidic blood pool and the long sight lines favor the Nurse's chain blinks. The map has 12 gens in the 2v8 layout (6 per side, 8 Survivors split 4 per side), which is the highest gen count in any current 2v8 map and slows the Survivor win timer to 6-7 minutes under optimal play. Captain pairings to prioritize on Nostromo: Xenomorph plus Trapper (trap coverage scales with map size), Xenomorph plus Doctor (small map favors static blast), Xenomorph plus Nurse (long sight lines favor chain blinks).
A-tier maps: MacMillan Estate and Hawkins National Laboratory. Both maps have the long sight lines and large gen counts that favor mid-range Killer pairings. The Xenomorph plus Nurse or Xenomorph plus Hillbilly are the dominant picks here. The Survivor counter is split-push: split 4-4 and force the Killer team to pick one side, then power through the other side.
A-tier map: Pale Rose. The ship map has tight interior corridors on the lower deck and open deck space on the upper. The Xenomorph's acidic blood pool is strong in the interior corridors. Captain pairings to prioritize: Xenomorph plus Executioner (trail attack through corridors), Xenomorph plus Hillbilly (chainsaw on the upper deck).
B-tier map: Raccoon City Police Department. A multi-floor map with strong pallet coverage. The Xenomorph is average here because pallets favor Survivors, but the Nurse and Hillbilly pairings still pull ahead. Captain pairings: Xenomorph plus Huntress (ranged hatchets clear pallets), Xenomorph plus Hillbilly (chainsaw breaks the pallet symmetry).
B-tier map: Midwich Elementary School. A small interior map. The Xenomorph's tail attack is effective but the small map means the Survivor team rotates quickly, and the Survivor win timer is short. Captain pairings: Xenomorph plus Trapper (trap density covers the small map), Xenomorph plus Doctor (static blast works indoors).
C-tier map: Coldwind Farm. A wide-open outdoor map that historically favors Survivors in 2v8 because the wide gen spacing means the Survivor team can split-push on every rotation. The Xenomorph is weaker here because Survivors can chain multiple gens per chase death. Avoid if possible; if forced, bring Xenomorph plus Hillbilly and concede the match tempo.
The quick rule for the final week is to prioritize Nostromo and MacMillan Estate whenever the random map allows. Both favor the meta S-tier pairings and both have quest progress bonuses (the Nostromo tiers count double on the Nostromo Wreckage map; the MacMillan tiers are the generic 10-match-with-Survivor-wins tier).
Final-Week Priority Checklist
The final week is short. Below is the day-by-day checklist for the September 23-29 grind window. Use this as a calendar; if you fall behind by 1 day, the entire schedule collapses.
September 23-24 (Days 1-2): unlock tier 1 rewards (1 match each). The tier 1 reward is 1 match in 2v8 during the event window. Every reward in the September 2026 collection has a tier 1 requirement that ticks progress after any completed match, win or loss. Play 2 matches on September 23, unlock all 12 tier 1 rewards, and you have already completed 17% of the total quest. This is the easiest progress to lock in, and should be the first thing any returning player does this week.
September 25-26 (Days 3-4): tier 2 rewards (5 matches each). Tier 2 requires 5 matches in 2v8 during the event window. The math is straightforward: 6 days remaining, 12 tier 2 rewards, target 5 matches each means you need 60 matches across 4 days, or 15 matches per day. That is roughly 90 minutes of queue time per day, which is doable but not trivial. Play 2v8 as your primary mode for these 2 days; do not switch to 4v1 unless the queue is dead. Use the BP code PLAYXENOMORPHIN2V8 for 200,000 BP per match during this window; it expires with the event.
September 27-28 (Days 5-6): tier 3 conditions. Tier 3 requires 10 matches with a specific condition per reward. The conditions vary: some rewards require 10 matches played on Nostromo Wreckage, some require 10 matches with the Xenomorph on the Killer team and the Survivor team winning, some require 10 matches with a specific Survivor class active. Read each reward's tier 3 condition in-game on September 25-26, plan which conditions are easiest to grind, and dedicate days 5-6 to those specific conditions. Avoid chasing conditions that require "Survivor team wins" because win condition is out of your control in solo queue.
September 29 (Day 7): final day. The event window closes at 00:00 UTC on September 29. That gives you the full day of September 28 plus the early hours of September 29 (depending on your time zone) to grind. Realistically, the only thing left at this point is cleanup: if you have 1-2 rewards left, prioritize them. If you have 3+ rewards left, accept the loss and do not panic-grind; the panic grind leads to tilt and bad play. The PLAYXENOMORPHIN2V8 BP code expires at the same time as the event, so spend the BP you have stockpiled.
Where to spend the BP. The 200,000 BP from PLAYXENOMORPHIN2V8 is best spent on Killer perks you have not unlocked yet. In 2v8 you cannot level perks by playing 2v8 alone; the perk XP comes from any mode. Spend the BP on the perks your tier 3 challenges use, like Hex: Ruin, Thanatophobia, or Corrupt Intervention for the Captain side, and Borrowed Time, Decisive Strike, or Prove Thyself for the Agent side. Unlocking these perks is the single best use of the bonus BP during the event.
Common Mistakes to Avoid
The final-week grind is unforgiving, and most players lose more rewards than they should to recurring mistakes. Below are the 5 most common errors to avoid.
Mistake 1: Grinding Bloodpoints over quest progress. The PLAYXENOMORPHIN2V8 code gives 200,000 BP per match, which is a strong BP bump. New players chase the BP and queue 4v1 instead of 2v8 because 2v8 BP is lower. The mistake costs quest progress. Only 2v8 matches count for the September event Quests. If you play 4v1, no quest ticks. Use the code in 2v8, not 4v1.
Mistake 2: Ignoring quest conditions until the last minute. Tier 3 has conditions. Many players play through September 23-26 ignoring the tier 3 conditions, then realize on September 27 that the conditions are hard. Read each reward's tier 3 condition by September 25 at the latest. Conditions like "Survivor team wins on Nostromo with the Medic Class" require planning, not hope.
Mistake 3: Playing solo when team composition matters. 2v8 is a team mode. Solo queue gives you random Captain pairings and random Survivor classes. If you are on the Survivor team and you have a 4-Survivor SWF, you can coordinate. If you are in solo queue, you cannot. The mistake is queuing solo and trying to win the match through perk power alone. Perk power matters, but team comp matters more. Use a SWF if you have one.
Mistake 4: Not using the BP code before it expires. The PLAYXENOMORPHIN2V8 code gives 200,000 BP and expires at 00:00 UTC on September 29. Players who save the code for "later" find that later never comes. Redeem the code on September 23 or 24 and use the BP immediately; the BP value is 200,000 BP today and 0 BP on September 30.
Mistake 5: Panic-grinding on September 29. If you have 3+ rewards remaining on September 28, the realistic outcome is you will unlock 1-2 of them at most. The mistake is spending all of September 29 in panic-grind mode and ending the event on a tilted note that ruins your next session. If you are 1-2 rewards short, fine: spend September 29 on the cleanup. If you are 3+ short, log in on September 29 for a single focused 2-hour session and then log off. The 2v8 mode will return; the tilt will not un-tilt on its own.
FAQ
When does 2v8 end exactly?
The September 2026 run of 2v8 ends at 00:00 UTC on September 29, 2026. In your local time, convert UTC to your timezone. Lisbon (UTC+0 in winter, UTC+1 in summer) sees the event end at 01:00 on September 29. New York (UTC-5 in EDT summer) sees the event end at 19:00 on September 28. The events typically lock out queues 30-60 minutes before the timestamp, so plan to finish your last match by 23:00 UTC on September 28 to be safe.
Will the Xenomorph return to 2v8?
Behaviour Interactive has not committed to bringing the Xenomorph back to 2v8 in any future iteration. The past 4 iterations of 2v8 have rotated the Killer roster, and the Xenomorph was added in the September 2026 iteration for the first time. There is no guarantee that the November 2026 iteration (if it runs) will include the Xenomorph. The safest assumption is that this is the only window to play 2v8 with the Xenomorph in 2026, and possibly for the rest of the year.
Are rewards permanent after unlock?
Yes. Every Alien-themed Badge, Banner, and Charm unlocked during the September 2026 event is permanent on the player account once tier 3 is completed. The cosmetics do not expire and will appear on the player card in any future 2v8 match. The only thing that expires is the quest progress; once the event window closes, unfinished rewards become unobtainable until a re-release, if any.
What if I miss the event entirely?
If you log in on October 1 and find that you missed the September 2026 event, the rewards are unobtainable. Past precedent is mixed: some 2v8 rewards have been re-released in the Rift 6-12 months after the original event, but most have not. The Nostromo Banner and the Acid Bath Charm are particularly at risk of staying exclusive. If you cannot play during the event, your only hope is a future re-release in the Rift or Archive, which is not guaranteed.
What is the best BP grinding method?
The best BP grinding method during the event is to play 2v8 matches to completion. Each 2v8 match awards roughly 30,000-50,000 BP across the Survivors and Killers, which is comparable to a 4v1 match but faster (2v8 matches average 6-10 minutes vs 4v1 12-18 minutes). Add the PLAYXENOMORPHIN2V8 bonus of 200,000 BP per match and you can stack BP very quickly. Save the BP for perks you have not unlocked yet, especially perks like Borrowed Time, Decisive Strike, and Hex: Ruin.
Does the PLAYXENOMORPHIN2V8 code expire?
Yes. The BP code PLAYXENOMORPHIN2V8 adds 200,000 BP and expires at 00:00 UTC on September 29, 2026, the same time as the event itself. Redeem the code by September 28 to use the bonus. Codes are typically entered in the in-game store under the "Redeem Code" option. After September 29, the code is invalid and cannot be redeemed.
Can you earn rewards in private matches?
No. Private 2v8 matches with friends do not count for Quest progress. Quest progress only ticks in public matchmaking 2v8 matches. The exception is that some weekend events allow custom game progress to count; check the in-game news tab for any custom-event flag during the final week.
What perks carry over from 4v1 to 2v8?
Most perks carry over from 4v1 to 2v8 with no changes. The 2v8 mode uses the same perk library as 4v1; perks unlocked in 4v1 work in 2v8 and vice versa. The only exception is the unique 2v8 Survivor Class Unlockable Skills, which are 2v8-only and do not appear in 4v1. Captain perks (Killer perks) work the same in both modes.
Closing Verdict
The September 2026 run of 2v8 ends on September 29 and there are 6 days remaining from today (September 23). The events of the final week determine whether you walk away with all 12 Alien-themed cosmetics or with a half-finished quest log. The priority order is clear: unlock tier 1 today, tier 2 by September 26, and the easiest tier 3 conditions on September 27-28. Use the BP code PLAYXENOMORPHIN2V8 for the 200,000 BP boost before it expires. Run Captain Build #4 (Xenomorph Endgame Lockdown) when you need a quick 4K and Agent Build #1 (Anti-Tunnel Defense) when you are solo queue on the Survivor side. Pair the Xenomorph with the Nurse on map default, swap to Hillbilly on open maps, and stick with Trapper on Nostromo. Avoid the panic-grind on September 29. The event ends, the rewards are permanent once unlocked, and 2v8's permanence hinges on the engagement signal. Get your rewards, play strong, and help push 2v8 into permanent status for 2027.