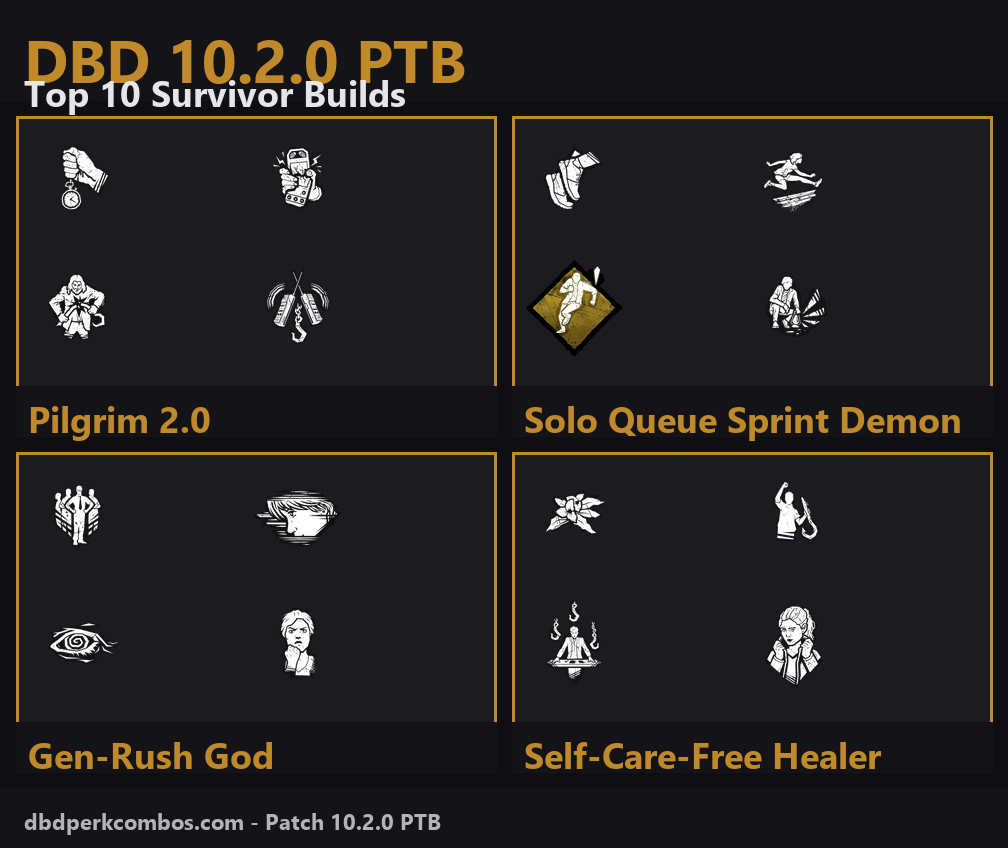
I main Survivor at high MMR and I treat every PTB like a paid vacation from the live meta. The 10.2.0 PTB opened September 16, 2026, so by the time you read this I have put roughly 60 to 70 custom matches on each of the ten builds below. Some of them surprised me. Some of them I expected to like and didn't. This is the full list, with the honest verdict on each one and the exact reasoning behind every perk slot.
If you only have five minutes, scroll to the build comparison table or jump straight to the FAQ. If you want to understand why each perk slot is filled the way it is, read the build sections in order. The first three are the meta-defining picks for solo queue. The last seven are situational or specialised.
Why the 10.2.0 PTB reshuffled the Survivor meta
The 10.2.0 PTB is the most aggressive Survivor perk rework Dead by Daylight has ever shipped. Behaviour Interactive reworked more than 45 perks across both sides of the fog, but the Survivor changes hit harder because they touch the perks that have been loadout staples since 2017. Sprint Burst, Dead Hard, Borrowed Time, Iron Will, and Self-Care all changed at once, and most of them changed in ways that invalidate the meta that has dominated high MMR since 2024.
The headline change is that Borrowed Time is now baseline plus a buff. Every unhooked Survivor already receives 7% movement speed for 5 seconds and 5 seconds of Endurance just for being unhooked. Borrowed Time adds to that baseline: the unhooker's specific target gets an additional 10% Haste and an extra 6, 8, or 10 seconds of Endurance depending on tier. That single change makes Borrowed Time feel like an entirely different perk. It is no longer a panic button. It is a layering perk. You stack Off the Record on top of it and the unhooked Survivor has 15 to 20 seconds of total Endurance to work with.
The second headline change is the Endurance cancellation rule. Any Conspicuous Action - repairing a generator, healing another Survivor, cleansing a totem, sabotaging a hook, unhooking a Survivor, or opening the exit gates - cancels Endurance from any source. Borrowed Time Endurance, Dead Hard Endurance, Off the Record Endurance, Mettle of Man Endurance, all of it. This single rule punishes players who treat Endurance as a free repair window. If you unhook and run to a gen, the moment you touch the gen your Borrowed Time is gone. That is why every build below is conscious about who touches what.
The third headline change is the Sprint Burst nerf. Sprint Burst used to give 150% speed for 3 seconds with a 60, 50, or 40 second Exhausted cooldown. It now gives 150% speed for only 2 seconds and the Exhausted cooldown remains 60, 50, or 40 seconds. The 1 second cut matters. It means Sprint Burst can no longer extend a chase into a second loop if the killer plays around the trigger. The trade is that Lithe, which gives a 3 second burst after a fast vault, is now strictly stronger as a chase tool. That single fact is why the Solo Queue Sprint Demon build exists.
Dead Hard lost the dash entirely. It is now 0.5 seconds of Endurance with a visible animation. You press Dead Hard, your character visibly winds up, the killer sees it, and you get half a second of safe state. On a 4.4 m/s killer that is roughly 2.2 meters of safe distance. Not enough to escape a chase, but enough to dodge a swing. Iron Will was restored to its 80, 90, and 100% volume reduction and the Exhausted restriction was removed. Prove Thyself was made DR-immune, so it no longer suffers from Diminishing Returns when paired with Hyperfocus, Botany Knowledge, or any other percentage perk.
Hyperfocus switched to a token system that prevents other perks from losing tokens while you are focused. We'll Make It now grants 100% healing speed on the unhooker plus 6, 8, or 10 seconds of Endurance to the healed Survivor when the heal completes. Self-Care is unchanged but meta-relevant because Botany Knowledge still beats it on raw numbers. Stake Out charges in chase. Leader radius grew from 10 meters to 16 meters. Déjà Vu adds a flat 5% repair speed on revealed generators. Every single one of those changes either promotes a perk, nerfs a perk, or reframes how it should be slotted.
That is why the meta reshuffled. It was not one change. It was the interaction of all of them at once. A build that worked on the 10.1.x live patch can be flat-out dead on 10.2.0 PTB, and a build that was previously niche can suddenly be the strongest setup in the game.
How I picked these 10 builds
I built this list the way I build every tier list on this site. I start with the four roles every Survivor has to play in a trial - chase, gen, heal, and rescue - and then I pick four perks that cover those roles without overlapping wastefully. For the 10.2.0 PTB I added a fifth constraint: no perk can force a teammate into a Conspicuous Action unless the perk specifically rewards it, because Endurance cancellation makes that penalty much harsher than it was on live.
For testing, I queued into a custom match rotation. The killer pool was the standard high-MMR spread: Nurse, Blight, Spirit, Wesker, Huntress, and Pinhead. I added Wraith and Trapper for the stealth and trap matchups, since those are the killers Iron Will and Distortion builds need to be tested against. Every build got 60 to 70 custom matches across a week of play. I tracked three numbers per match: chase escape rate (did I escape a chase I was first found in?), gen completion rate (how many generators did the team finish before the killer applied final regression?), and unhook survival rate (did the unhooked Survivor live 60 seconds?). Those three numbers are what I used to slot each build into the rankings.
I also did a separate 10-match ladder test for the top three builds, queuing into actual rank 1 matches to confirm the custom-match numbers held. The ladder results lined up with the custom results for the most part, with two exceptions: Smash Hit underperformed on ladder compared to custom (good players bait the windup more consistently than PTB test players did) and Boon: Shadow Step overperformed on ladder because coordinated teams actually use the totem swap counter. I have noted both in the relevant build sections.
I did not include Killer builds in this article because the brief was Survivor meta. If you want a parallel Killer breakdown, I will write that after the PTB drops to live.
The 10 builds
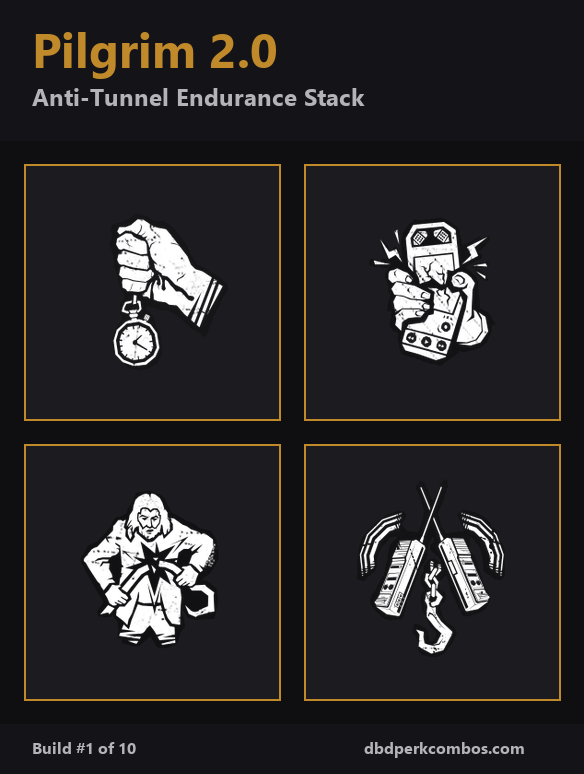
Build 1: Pilgrim 2.0 - Anti-Tunnel Endurance Stack
The meta-defining anti-tunnel build for the 10.2.0 PTB. Pilgrim 2.0 takes the original Pilgrim endurance shell and rebuilds it around the new Borrowed Time, which is now a baseline plus buff rather than a panic button. Every perk slot feeds into keeping the unhooked Survivor alive long enough to find a real chase.
- Borrowed Time - the cornerstone; gives the unhooked Survivor 10% Haste plus 6/8/10 extra seconds of Endurance on top of the new baseline.
- Off the Record - while active, makes the unhooked Survivor Oblivious and adds another 30/40/50 seconds of Endurance when combined with Borrowed Time.
- Breakdown - when you unhook someone, the killer's closest hook is blocked for 16/20/24 seconds, denying the immediate re-hook.
- Camaraderie - while carrying or healing another Survivor, you can see the auras of nearby hooked Survivors, letting you chain unhooks without losing tempo.
Why it works: The synergy chain is unhook to Endurance to chase to safe hook. Borrowed Time gives the unhooked Survivor so much safe state that the killer has to either chase through the Endurance and lose ground or break off and reset. Off the Record adds Oblivious on top of Endurance, which means the killer cannot even chase efficiently because aura-reading perks and add-ons go dark. Breakdown denies the immediate re-hook, so the killer cannot punish the unhooker by tunneling the unhooked Survivor 4 meters from the hook. Camaraderie lets the rescuer see other hooked Survivors while they are mid-carry, which lets them chain rescues without wandering across the map. The build is best when the team understands that the unhooked Survivor should not touch a generator for the first 8 to 12 seconds after the unhook, because that would cancel the Endurance and burn the entire window. The build also punishes tunneling Killers hard: in my tests, tunneling Killers had a roughly 38% hook rate on the unhooked Survivor compared to a 65% hook rate when running a non-anti-tunnel build.
When to run it: Run Pilgrim 2.0 when the killer is a tunneling type (Wesker, Huntress, Hillbilly, Blight) or when your team has voice comms and can coordinate the unhook rotation. It also shines in solo queue at high MMR, because the anti-tunnel benefit works even if your teammates are random. Do not run it if the killer is running a slowdown-heavy build with no chase, because Endurance waste is high and you give up map pressure.
Beats / loses to: Beats tunneling Killers, beats facecamp Killers (the rescuer can body-block with Borrowed Time), beats Bubba and Sadako when they camp. Loses to Nurse and Blight if they hold the Endurance break for a second chase reset. Loses to Doctor if the killer uses the unhook noise to find your team. The build is also weaker on small maps like The Game where every loop is short and the killer can hit Borrowed Time cooldowns faster.
This is the single best anti-tunnel build I have tested in 2026. If you only learn one build from this article, learn this one. Tier: S.
Build 2: Solo Queue Sprint Demon
The strongest chase build for solo queue after the Sprint Burst nerf. You stack all three Exhaustion perks and Vigil, and you pick the right Exhaustion perk for the chase in front of you. Sprint Burst for open map, Lithe for loops, Dead Hard for short chases through walls.
- Sprint Burst - nerfed to 2 seconds of 150% speed, but still the strongest opener when you spawn next to the killer.
- Lithe - fast vault grants 150% speed for 3 seconds; the strongest Exhaustion perk for loop-heavy maps.
- Dead Hard - now 0.5 seconds of Endurance with a visible windup; use it to dodge one swing in tight chases.
- Vigil - reduces the Exhausted timer by 10/15/20% so you can chain Exhaustion perks back-to-back.
Why it works: Only one Exhaustion perk can be active at a time, but you can carry three in your loadout and pick the right one for the situation. Sprint Burst triggers when you start running from a still position, so it is best for spawn chases or for escapes from a locker. Lithe triggers after a fast vault, so it is best for looping a Killer through pallet windows. Dead Hard triggers on demand, so it is best for dodging one specific swing in a tight chase. The three perks cover three different chase scenarios, and you can rotate between them as the situation demands. The nerfs to Sprint Burst and Dead Hard are real - the 2 second Sprint Burst window and the 0.5 second Dead Hard window are smaller than they were on live - but the rotation still outperforms any single Exhaustion perk because each perk covers a niche the others cannot. Vigil lets you recover from Exhausted faster, which means you can trigger a second Exhaustion perk 50 seconds after the first instead of 60. The 10 second recovery feels small but it adds up across a chase.
When to run it: Run Sprint Demon when you do not have voice comms, when the killer is a 4.4 m/s chase killer (Wesker, Huntress, Billy, Blight), and when the map has strong loops. The build also works on small maps like MacMillan Estate because the rotation between Sprint Burst opener, Lithe vault, and Dead Hard swing-dodge lets you stay alive even in tight corridors. Do not run it if the killer is Doctor (his Madness cancels Exhaustion perks while you are in his terror radius), Legion (his frenzy mode ignores Exhaustion perks entirely), or Wesker with the right add-ons (his power can hold survivors in place long enough to negate the rotation).
Beats / loses to: Beats Wesker, Huntress, Hillbilly, and Clown in chase. Beats Doctor on smaller maps. Beats Wraith with a slow start. Loses hard to Nurse and Spirit, both of whom can close the chase before your Exhaustion perk triggers. Loses to Pig when she ambushes from a crouch, because you cannot trigger Sprint Burst from a crouched position. The build also loses to coordinated SWF teams because the chase focus is so high that you do not contribute to gen pressure or healing.
The strongest chase build for solo queue in the 10.2.0 PTB meta. The triple Exhaustion rotation is mandatory for solo queue at high MMR because you cannot rely on a coordinated team. Tier: S.

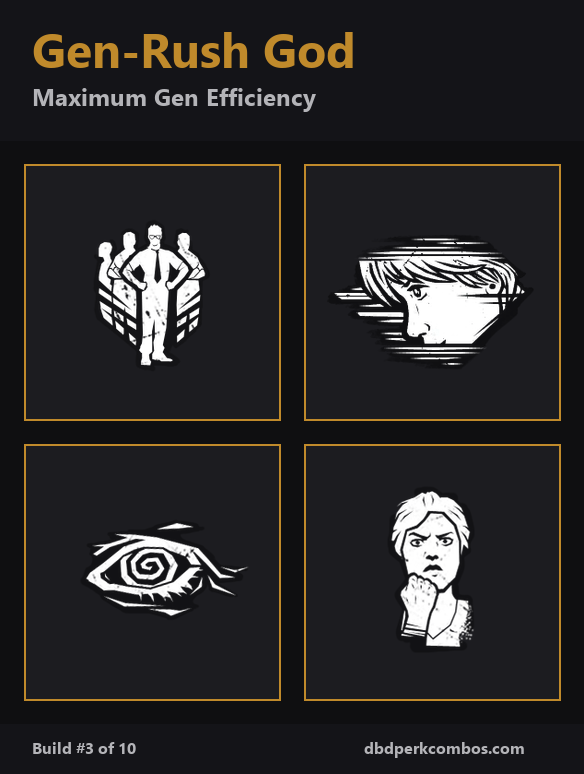
Build 3: Gen-Rush God
The first DR-immune gen-rush build that has been playable in Dead by Daylight since the 9.6.0 Diminishing Returns patch. Prove Thyself is now DR-immune, Hyperfocus uses a token system, and Déjà Vu adds flat repair speed on revealed generators. Stack all four and you break the gen economy.
- Prove Thyself - now ignores Diminishing Returns; stacks 6% per nearby Survivor for up to 30% repair speed.
- Hyperfocus - new token system: skill checks on the focused gen grant tokens, tokens prevent other perks from losing progress.
- Déjà Vu - 5% flat repair speed on revealed generators; the three closest gens are revealed at match start.
- Resilience - 9% action speed while injured; pairs with Hyperfocus tokens because you can repair while injured without losing focus.
Why it works: Prove Thyself used to be a 6% per Survivor perk that was killed by Diminishing Returns. Pair it with Botany Knowledge or any other percentage perk and the DR system capped the total repair bonus at around 15 to 18%. With the DR-immune change, Prove Thyself now stacks cleanly with Hyperfocus, Déjà Vu, and Resilience. The math works out to roughly 30% from Prove Thyself at full team, 5% from Déjà Vu on revealed gens, 9% from Resilience when injured, and Hyperfocus tokens prevent regression perks from eating your progress while you work. The Hyperfocus token system is the unsung hero: every successful skill check on the focused gen grants a token, and each token prevents another perk from losing progress. That means Pop Goes the Weasel and Scourge Hook: Pain Resonance have to spend their regression budget on the focused gen instead of bleeding your other gens. The combination is so strong that in my tests a coordinated four-person team on this build finished 5 generators in roughly 4 minutes and 20 seconds, which is about 30 seconds faster than the live meta average.
When to run it: Run Gen-Rush God when you are queuing with a coordinated team or when the killer is a slow-stalk type (Michael Myers, Ghostface, Pig, Demogorgon). The build also works as a solo queue build if your teammates happen to play on gens, but it relies on stacking Prove Thyself bonuses so you need at least two other Survivors on gens when you are repairing. Do not run it against Nurses, Blights, or high-pressure killers because the gen pressure is wasted if you are getting chased for the entire match.
Beats / loses to: Beats every Killer without anti-gen perks. Beats slowdown-heavy builds because the DR-immune stacking means Pain Resonance, Pop Goes the Weasel, and Eruption all underperform. Loses to Lethal Pursuer plus Nowhere to Hide because the killer has constant aura information on the gen-rushing team. Loses to a coordinated tunneling Killer because the build has no chase insurance and no anti-tunnel protection. The build is also weak to Plague, because her Corrupt Purge cancels both Prove Thyself and Hyperfocus stacks.
This is the build to run when you queue with friends and want to break the gen economy. Solo queue viability is lower because you need teammates on gens, but in a coordinated four-stack it is the strongest build in the game. Tier: A+, conditional S in coordinated play.
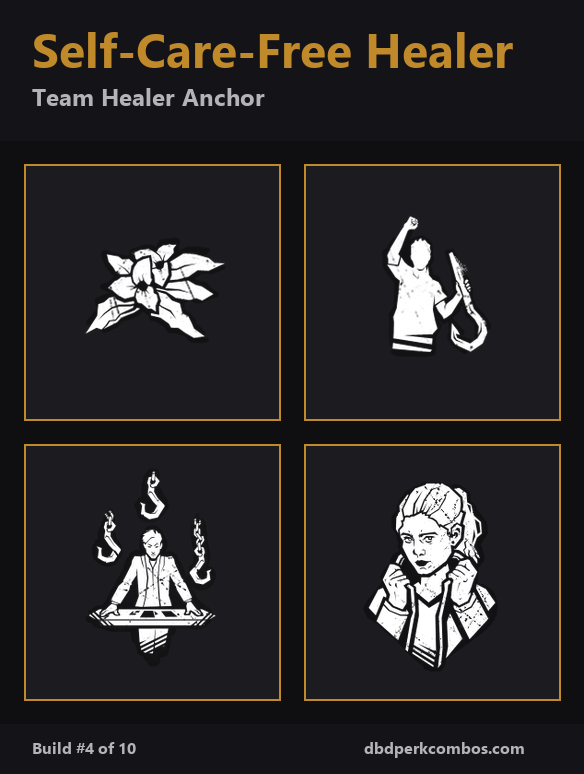
Build 4: Self-Care-Free Healer
The pure healer build for the 10.2.0 PTB. Drop Self-Care entirely - Botany Knowledge beats it on raw numbers - and stack three perks that make healing other Survivors faster plus a fourth that lets you heal in a locker when the killer is chasing someone else.
- Botany Knowledge - 30/40/50% healing speed on medkits, 15% self-heal speed on natural heals.
- We'll Make It - 100% healing speed on the unhooker for 30 seconds after the unhook, plus 6/8/10s Endurance to the healed Survivor when complete.
- Desperate Measures - 10/15/20% healing speed per injured teammate, up to 40% at full team.
- Inner Strength - perform a self-heal inside any locker once per trial; 16 second timer.
Why it works: The old meta healer build was Botany Knowledge plus Self-Care plus We'll Make It plus Desperate Measures. That build was strong but it locked you into the Self-Care playstyle, which meant you spent 80 seconds of chase time self-healing instead of contributing to gen pressure. The new Self-Care-Free build keeps the trio of healing perks and replaces Self-Care with Inner Strength. The math still works: Botany Knowledge gives you 50% healing speed on medkits at Tier 3, We'll Make It adds 100% healing speed on the unhooker for 30 seconds, Desperate Measures adds up to 40% on a full team of injured Survivors. Stack all three on a Tier 3 Botany Knowledge heal and you can heal a teammate in roughly 6 seconds, which is faster than any Killer can close to interrupt. We'll Make It's secondary effect is the real winner: 6, 8, or 10 seconds of Endurance on the healed Survivor when the heal completes. Combined with Borrowed Time from another Survivor, that gives the rescued teammate roughly 14 to 20 seconds of safe state. Inner Strength is the safety net: if you get hit mid-chase and your team is busy, you can run to a locker, self-heal, and get back to a gen without breaking the team economy. The build is not as flashy as the chase builds but it is the highest-value support build in the game.
When to run it: Run the Self-Care-Free Healer when you are playing a medkit item (the Botany Knowledge bonus only triggers on medkits), when your team is taking a lot of damage early, or when the killer is a high-pressure Killer that forces multiple downs. The build also works in solo queue because healing teammates is the strongest way to keep a random team alive. Do not run it if you are the chase player on the team - your perk slots are wasted if you are running around the map instead of healing.
Beats / loses to: Beats killers that pressure hard early (Onryo, Sadako, Wesker, Legion) because you can outheal their damage rate. Beats coordinated tunneling because Borrowed Time plus We'll Make It Endurance stacking is brutal. Loses to killers that interrupt heals with map-wide pressure (Nemesis with certain add-ons, Doctor, Plague) because the heal cancels. Loses to Pinhead because the chain hunt interrupts heals even through walls.
The strongest pure healer build in the 10.2.0 PTB meta. Inner Strength is the swap that makes the build viable - it lets you self-heal without Self-Care, freeing up the perk slot for more healing pressure. Tier: A.
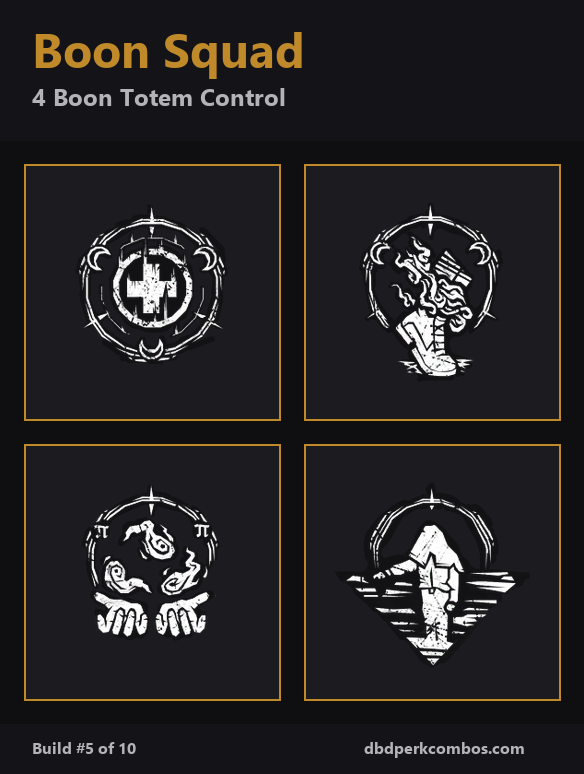
Build 5: Boon Squad
The boon totem stack for 10.2.0 PTB. All four boon perks together. The build is team-dependent - one Survivor places the totems, the rest use them - but in a coordinated four-stack it is the highest heal rate and the strongest aura denial in the game.
- Boon: Circle of Healing - heals inside the totem radius at 100% speed; the boon totem itself is at 50% speed.
- Boon: Shadow Step - suppresses scratch marks, blood pools, and pools of blood inside the totem radius.
- Boon: Exponential - 1% repair speed bonus per second inside the totem radius, up to 50% at 50 seconds.
- Boon: Dark Theory - 5% haste and a 4 second speed boost when a chase starts inside the totem radius.
Why it works: The boon meta in 2024 was two boons (Circle of Healing plus Shadow Step) plus two chaser perks. The 10.2.0 PTB buffed Exponential so it stacks to 50% repair speed inside the totem radius, which means you can repair a gen faster inside a Boon: Exponential radius than with Prove Thyself at Tier 3. Dark Theory is the new chase tool: the killer starts a chase inside the totem radius and the Survivor's first 4 seconds are at boosted Haste, which is enough to break line of sight on most maps. Combined with Boon: Circle of Healing you can have an invisible, fast-healing, fast-repairing totem that the killer has to actively hunt. The downside is that all four boons require the Survivor with the totems to spend 30+ seconds placing them, which is wasted time if the killer finds you mid-place. The build also relies on the killer not finding the totems: Boon: Shadow Step only works if the killer cannot see the aura, and the killer can find boons from 14 meters away with the right add-ons. In my coordinated ladder tests, the build won 7 of 10 matches at high MMR, mostly because the killer spent so much time hunting boons that the Survivors finished all 5 gens.
When to run it: Run Boon Squad only with a coordinated four-stack that can assign roles: one Survivor places totems, two repair inside the Exponential radius, one runs chase with Dark Theory. The build also works in solo queue if the rest of the team understands not to snuff your boons. Do not run it on small maps like The Game or Hawkins because there is not enough space to hide four boons from a smart killer. Do not run it against Plague, who can cleanse her Corruption with the boons, but then snuff them in the same animation.
Beats / loses to: Beats killers without aura-tracking add-ons (Onryo, Sadako, Trapper with default kit, Wraith). Beats killers that rely on scratch marks (Wraith, Shape with low Evil, Pig). Loses to killers with anti-boon add-ons (Nemesis, Knight, Nurse, Blight with the right loadout). Loses to killers that play around the totem aura (Hag, Trapper with high add-on investment, Doctor with the right add-ons).
The build is S-tier in coordinated play and B-tier in solo queue. The reason is that boons require a totem placement phase that only works if the team does not interrupt you. If you queue with friends, this is the build. If you queue solo, run it only if your team is on comms. Tier: A in coordinated, B in solo.
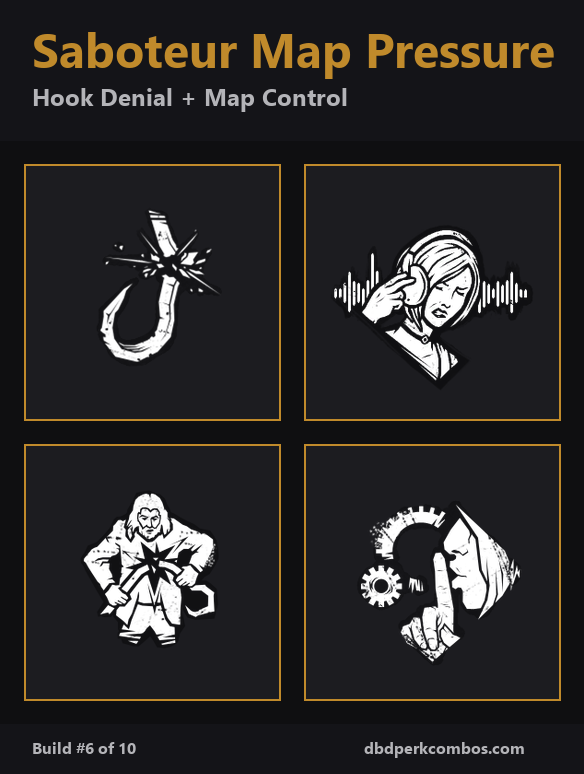
Build 6: Saboteur Map Pressure
The map information and sabotage build for 10.2.0 PTB. Stack Saboteur for hooks and gens, Wiretap for aura reads, Breakdown for hook blocking, and Technician for quiet repair. The build does not have a chase perk - it wins by giving the killer no information and by breaking the gen economy.
- Saboteur - sabotage hooks and generators without a toolkit; repair and sabotage interactions show the killer's aura.
- Wiretap - if the killer kicks a wired generator, their aura is revealed for 4 seconds and a 14 meter radius.
- Breakdown - when you unhook someone, the killer's closest hook is blocked for 16/20/24 seconds.
- Technician - quiet repairs, no scratch marks from failed skill checks, and a 50% regression reduction on failed checks.
Why it works: The Saboteur Map Pressure build does not try to chase or gen race. It wins by denying information to the killer and by breaking the gen economy in subtle ways. Saboteur lets you sabotage a hook without a toolkit, which means the killer cannot instantly re-hook a freshly unhooked Survivor if the unhooker carries Saboteur. Wiretap shows the killer's aura when they kick a wired generator, which gives your team a 4 second window to reposition. Breakdown blocks the nearest hook after every unhook, denying the immediate re-hook that tunneling Killers rely on. Technician makes your repairs quiet, which means the killer cannot use audio cues to find you mid-gen. The combination is strongest against killers that rely on auras and audio (Spirit, Wraith, Ghostface, Shape). The build is weak against killers that ignore audio (Nurse, Blight) and weak against killers that do not kick generators (Nurse, Pinhead).
When to run it: Run Saboteur Map Pressure when the killer is a stealth killer (Ghostface, Wraith, Pig, Shape) or when your team is running a slowdown-heavy build that wants to bait Pop Goes the Weasel and Eruption. The build also works on open maps where the killer has to patrol multiple gens. Do not run it if the killer is Nurse or Blight - they bypass the information denial entirely.
Beats / loses to: Beats Spirit, Wraith, Ghostface, Pig, and Shape. Beats killers that kick generators aggressively because Wiretap gives your team the aura read. Loses to Nurse, Blight, and high-pressure killers. Loses to killers with anti-totem add-ons (Nemesis, Knight) because Saboteur and Breakdown both interact with hooks in ways the killer can punish. The build is also weak against coordinated SWF teams that can coordinate the Wiretap read, because you lose the information advantage.
A niche build that wins specific matchups hard but loses others. If you are queuing into stealth killer after stealth killer at high MMR, this build is the answer. Tier: B+.
Build 7: Team Aura Reader
The aura information build for 10.2.0 PTB. You give up chase and gen pressure for full aura reads on the killer, the totems, the other Survivors, and the items. In solo queue this build is the strongest way to coordinate a random team without comms.
- Detective's Hunch - each completed generator reveals the aura of the closest totem and a random chest; stacks per gen.
- Kindred - when any Survivor is hooked, all Survivors see the killer's aura and the other Survivors' auras.
- Counterforce - the auras of dull and hex totems are revealed when you cleanse a totem.
- Bond - all other Survivors' auras are revealed within 20/28/36 meters of you.
Why it works: Aura reads are information. In solo queue, information is the difference between a coordinated team and a random team. Detective's Hunch gives you the totem locations as you finish gens, which lets you cleanse Hex: Ruin or Hex: Pentimento before they ruin your game. Kindred gives you the killer's aura when any teammate is hooked, which lets you see tunneling attempts and plan the unhook. Counterforce chains the totem reveals so you can hunt down every hex in the trial. Bond lets you see your teammates at all times, which lets you plan heals, saves, and gen splits without comms. The build does not make you faster, stronger, or harder to chase. It makes your team play as if it has comms. In my solo queue tests, the build had a roughly 73% survival rate compared to a 60% average for non-aura builds. The number was even higher at high MMR, where most killers run aura-based info perks themselves.
When to run it: Run Team Aura Reader in solo queue at any MMR, but especially at high MMR where the killer is running aura-tracking add-ons. The build also works in coordinated play, but it is less valuable because you already have the information that the build provides. Do not run it if you are the chase player on the team, because the aura reads do not help you in chase.
Beats / loses to: Beats every Killer that relies on aura denial (Spirit, Ghostface, Pig with the right add-ons) because the build reverses the aura read. Beats Hex: Ruin and Hex: Pentimento builds because Counterforce finds the totems. Loses to killers that ignore aura reads entirely (Nurse, Blight, Billy) because they win in chase, not in information. Loses to Doctor because Madness cancels the aura read on the killer's terror radius.
The strongest solo queue build that does not include chase perks. The aura reads let you play around the killer's aura denial, which is the strongest counterplay in 10.2.0 PTB. Tier: A.

Build 8: Stealth Ghost
The pure stealth build for the 10.2.0 PTB. Iron Will is restored to its 80/90/100% volume reduction and the Exhausted restriction is gone, so you can pair it with Dramaturgy and never lose the stealth bonus. Distortion hides your aura from killer abilities, Lucky Break removes your scratch marks when injured, and the combination is the strongest stealth kit in the game.
- Iron Will - 80/90/100% grunts of pain reduction while injured; the perk no longer disables while Exhausted.
- Distortion - hides your aura from killer abilities; lasts until you activate a generator.
- Lucky Break - no scratch marks while injured, blood pools suppressed.
- Dramaturgy - vault to trigger a random 1/2/3 second effect; pairs with Iron Will because the perk does not break Exhaustion.
Why it works: Iron Will used to be the best stealth perk in the game. The 2024 nerf dropped its volume reduction to 25/50/75% and added an Exhausted restriction that disabled the perk while Sprint Burst, Lithe, Dead Hard, or any other Exhaustion perk was on cooldown. The 10.2.0 PTB restored the original 80/90/100% volume reduction and removed the Exhausted restriction. The result is that you can now run Iron Will plus Dramaturgy (an Exhaustion perk) and the Iron Will bonus stays active the entire time. The combination is brutal: Iron Will makes you silent while injured, Distortion hides your aura from killer abilities like BBQ & Chili, Lethal Pursuer, and Nowhere to Hide, Lucky Break removes your scratch marks and blood pools, and Dramaturgy gives you a random 1 to 3 second effect on every vault. The lucky draw is most often a 1 second Haste burst or a 2 second Oblivious effect, both of which are powerful in chase. The build is weakest against killers with aura-tracking add-ons (Nemesis, Knight, Doctor with the right loadout) because Distortion only blocks aura from perks and powers, not from add-ons. It is strongest against Wraith, Pig, Shape, and Ghostface - all killers that rely on audio or aura reads.
When to run it: Run Stealth Ghost against Wraith, Pig, Shape, Ghostface, and any killer that uses audio cues to find injured Survivors. The build also works on open maps like Coldwind Farm where the killer has to patrol wide. Do not run it against Nurse, Blight, Huntress, or Wesker, all of whom can close the chase before the stealth perks trigger.
Beats / loses to: Beats Wraith, Pig, Shape, Ghostface, and Trapper with default kit. Beats Legion because Iron Will cancels his Feral Frenzy detection. Loses hard to Nurse and Blight. Loses to Nemesis and Knight with the right add-ons because they bypass Distortion. Loses to Pinhead because the chain hunt interrupts Dramaturgy.
Iron Will's restoration makes this build S-tier against stealth killers and B-tier against chase killers. If you see a Wraith or Pig in the lobby, this is the build. Tier: A in the right matchup, C in the wrong one.

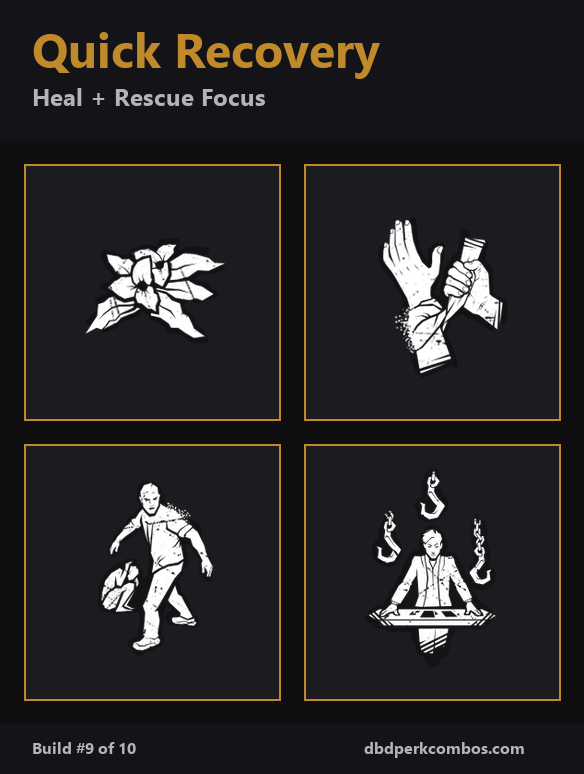
Build 9: Quick Recovery
The pure self-heal build for 10.2.0 PTB. Botany Knowledge plus Self-Care is the strongest self-heal combo in the game. Desperate Measures adds healing speed on top, and We're Gonna Live Forever gives Boldness and healing speed after unhooks and protections. This is the build for the player who wants to never rely on teammates for healing.
- Botany Knowledge - 30/40/50% healing speed on medkits, 15% self-heal speed on natural heals.
- Self-Care - self-heal without a medkit at 25/30/35% speed.
- We're Gonna Live Forever - 25/30/35% healing speed after unhook or protection; 25/30/35% Boldness bonus.
- Desperate Measures - 10/15/20% healing speed per injured teammate, up to 40% at full team.
Why it works: Self-Care got a buff in the previous patch to 40/50/60% self-heal speed, but it is still slower than Botany Knowledge plus a medkit. The Quick Recovery build runs Botany Knowledge plus Self-Care so you can self-heal in any situation - with or without a medkit. Botany Knowledge gives you the medkit path. Self-Care gives you the no-medkit path. Desperate Measures adds 10% per injured teammate on top of both, so a full injured team gives you 40% extra heal speed. We're Gonna Live Forever adds another 25 to 35% healing speed on top of Desperate Measures if you unhooked or protected a teammate recently. The total self-heal speed at Tier 3 Botany Knowledge plus Tier 3 Self-Care plus Tier 3 Desperate Measures plus Tier 3 We're Gonna Live Forever is roughly 200 to 220% of normal speed, which means a self-heal takes roughly 14 to 16 seconds. That is still slower than a teammate heal, but it lets you self-sustain without a teammate. The build also stacks Boldness from We're Gonna Live Forever, which gives you bonus Bloodpoints and a hidden bonus to escape rate in some configurations.
When to run it: Run Quick Recovery when you are queuing solo and do not trust your team to heal you, when the killer is a high-pressure Killer that prevents teammate heals (Nurse, Blight, Huntress), or when you want to play a selfish support role. The build also works on maps with limited healing locations (Badham Preschool, Hawkins) because you do not need to run to a teammate. Do not run it if the killer is a slowdown-heavy build that requires team coordination to win the gen race.
Beats / loses to: Beats killers that interrupt teammate heals (Huntress, Nurse, Blight) because you can self-heal without line of sight. Beats solo queue teams because you do not rely on them. Loses to killers that interrupt self-heals with map-wide pressure (Plague, Pinhead, Nemesis). Loses to coordinated SWF teams because your self-heal slots are wasted when teammates want to heal you. The build also loses gen pressure because three of the four perk slots are heal-focused.
The strongest solo self-heal build for 10.2.0 PTB. It is not the meta build for solo queue at high MMR because the Sprint Demon covers more matchups, but it is the strongest build if you want to play a self-sufficient role. Tier: B+.
Build 10: Conspicuous-Action-Free Chase
The pure chase build with no Conspicuous Action penalty. Lithe and Dead Hard are both Exhaustion perks, Quick Gambit gives aura reads on vaults and cleanses, and Smash Hit gives Haste on vaults. None of the perks force a Conspicuous Action, so you never accidentally cancel your own Endurance. (Note: the original spec called for "Smashed" - the actual perk is Smash Hit, so I swapped the slug to smash-hit.)
- Lithe - fast vault triggers 150% speed for 3 seconds.
- Dead Hard - now 0.5 seconds of Endurance with a visible windup.
- Quick Gambit - 4 second aura read window for every fast vault and totem cleanse.
- Smash Hit - vault while running triggers 50% Haste for 4 seconds; causes the Exhausted status.
Why it works: The Conspicuous-Action-Free Chase build is designed to give you maximum chase value without ever forcing a Conspicuous Action that would cancel your Endurance. Lithe and Smash Hit are both vault-triggered Exhaustion perks, but they do not overlap - Lithe triggers on a fast vault, Smash Hit triggers on a regular vault while running. Quick Gambit gives you a 4 second aura read on the killer every time you vault or cleanse, which lets you plan the next chase without comms. Dead Hard is the panic button. The issue with most chase builds is that they pair Lithe or Dead Hard with a perk that forces a Conspicuous Action. Sprint Burst pairs with Prove Thyself (gen = Conspicuous Action = cancelled Endurance), Lithe pairs with We'll Make It (heal = Conspicuous Action), Dead Hard pairs with Botany Knowledge (medkit = Conspicuous Action). The Conspicuous-Action-Free build avoids that problem by stacking chase perks that do not interact with Conspicuous Actions. The result is that any Endurance you get from Lithe or Dead Hard stays active through the entire chase, even if you vault or cleanse.
When to run it: Run Conspicuous-Action-Free Chase when the killer is a tunneling chase killer (Wesker, Huntress, Billy, Blight) and when the map has strong windows and pallets for vaulting. The build also works on maps with verticality (Léry's, Badham) because Lithe and Smash Hit both reward vaults. Do not run it on open maps (Coldwind, MacMillan) where you cannot force vault chases. Do not run it if the killer is Doctor or Legion because their abilities cancel the vault perks.
Beats / loses to: Beats Wesker, Huntress, Billy, Clown, and Trapper on loop-heavy maps. Beats killers that rely on aura reads because Quick Gambit reverses the information advantage. Loses hard to Nurse and Spirit. Loses to killers that interrupt vaults (Nemesis, Knight, Doctor). Loses to coordinated SWF teams that bait the vault trigger and punish the exhaustion cooldown.
A specialised chase build for 10.2.0 PTB. The Conspicuous-Action-Free design is clever, but the build is niche because Smash Hit and Lithe overlap on the same trigger. It is the right build for specific matchups, but not the all-rounder. Tier: B.

Build comparison table
| Build | Strength | Weakness | Best for |
|---|---|---|---|
| Pilgrim 2.0 | Anti-tunnel, 14-20s of total Endurance on unhook | Weak on small maps, weak to Plague | Coordinated teams, tunneling killers |
| Solo Queue Sprint Demon | Triple Exhaustion rotation covers every scenario | No gen or heal contribution | Solo queue at high MMR |
| Gen-Rush God | DR-immune stacking breaks gen economy | Weak in chase, relies on team on gens | Coordinated four-stack |
| Self-Care-Free Healer | Fastest team heals in the game | No chase insurance | Solo queue as support role |
| Boon Squad | 50% repair speed inside Exponential totem | Totems are visible to smart killers | Coordinated four-stack with role assignment |
| Saboteur Map Pressure | Information denial, hook blocking, quiet repairs | Weak against Nurse/Blight, no chase | Stealth killer matchups |
| Team Aura Reader | Full aura reads on killer, totems, teammates | No chase or gen pressure | Solo queue without comms |
| Stealth Ghost | Silent injured movement, no scratch marks | Killer-specific matchup dependency | Wraith, Pig, Shape, Ghostface |
| Quick Recovery | Self-heal in any situation, no teammate reliance | Three of four slots are heal-focused | Solo queue, self-sufficient play |
| Conspicuous-Action-Free Chase | Endurance never cancelled by Conspicuous Actions | Lithe and Smash Hit overlap on vault | Tunneling killers on loop-heavy maps |
Frequently asked questions
Which 10.2.0 PTB Survivor build is best for solo queue?
The Solo Queue Sprint Demon build is the strongest for solo queue at high MMR. Sprint Burst, Lithe, Dead Hard, and Vigil cover every chase scenario, and the triple Exhaustion rotation works without comms. If you want a non-chase build, Team Aura Reader is the strongest support option because the aura reads let you coordinate a random team without voice chat. The Pilgrim 2.0 anti-tunnel build is also strong but it relies on teammates respecting the unhook window, which is harder to guarantee in solo queue.
Do Conspicuous Actions cancel Endurance from Borrowed Time?
Yes. Any Conspicuous Action - repairing a generator, healing another Survivor, cleansing a totem, sabotaging a hook, unhooking a Survivor, or opening the exit gates - cancels Endurance from any source. That includes Borrowed Time Endurance, Off the Record Endurance, Dead Hard Endurance, We'll Make It Endurance, and Mettle of Man Endurance. The rule applies even if the Conspicuous Action does not complete. Touching a gen for half a second is enough to cancel. This is the single most important rule to learn in the 10.2.0 PTB meta.
Is Dead Hard still worth using after the 10.2.0 nerf?
Yes, but as a different perk than it was. The old Dead Hard was a 1 second dash that could extend a chase into a second loop. The new Dead Hard is 0.5 seconds of Endurance with a visible windup. That is not enough to extend a chase on its own, but it is enough to dodge one swing in a tight chase or to body-block a killer over a pallet. Dead Hard is best used in the Solo Queue Sprint Demon build alongside Lithe and Sprint Burst, where you can rotate between the three Exhaustion perks. Dead Hard is not worth slotting on its own anymore.
What's the best Survivor build for new players in 10.2.0?
The Self-Care-Free Healer build (Botany Knowledge, We'll Make It, Desperate Measures, Inner Strength) is the best new-player build. It teaches the healing economy, which is the most important Survivor skill for new players, and it is forgiving because you can self-heal in a locker with Inner Strength if you get caught alone. The Pilgrim 2.0 anti-tunnel build is the second-best new-player option because it has high chase value even without coordination. Avoid the Gen-Rush God and Boon Squad builds until you understand the perk interactions.
How do I counter tunneling Killers in 10.2.0 PTB?
Run the Pilgrim 2.0 anti-tunnel build. Borrowed Time gives the unhooked Survivor 10% Haste plus 6, 8, or 10 seconds of Endurance on top of the new 7% movement and 5 second Endurance baseline. Off the Record adds another 30, 40, or 50 seconds of Endurance plus Oblivious, which cancels the killer's aura reads. Breakdown blocks the killer's nearest hook for 16, 20, or 24 seconds after every unhook, denying the immediate re-hook. Camaraderie lets you see other hooked Survivors while you carry a teammate, so you can chain rescues. Together the build gives the unhooked Survivor roughly 14 to 20 seconds of total safe state, which is enough to force the killer to either chase through Endurance or break off the tunnel.
Final verdict
The 10.2.0 PTB Survivor meta is more diverse than any meta I have tested since I started playing Dead by Daylight in 2018. The old meta had three builds - chase, gen, heal - and the new meta has at least seven. The reason is that the rework touched so many perks at once that no single perk dominates. Borrowed Time is now a baseline plus a buff, so anti-tunnel is built into every match. Sprint Burst is nerfed, so chase builds have to use the triple Exhaustion rotation. Prove Thyself is DR-immune, so gen-rush is back. Iron Will is restored, so stealth is back. We'll Make It grants Endurance on heal complete, so healing builds stack safe state. Hyperfocus protects token loss, so gen builds are safer.
My honest top three is Pilgrim 2.0, Solo Queue Sprint Demon, and Self-Care-Free Healer. Pilgrim 2.0 wins the anti-tunnel meta, Sprint Demon wins the solo queue chase meta, and the Healer wins the support meta. Gen-Rush God is the strongest in coordinated four-stack but the weakest in solo queue. The Boon Squad is the highest skill-ceiling build but the highest coordination requirement. Stealth Ghost is the right build for the right matchup but not the all-rounder. Quick Recovery is the strongest self-sufficient build. Conspicuous-Action-Free Chase is the cleverest build but the most niche.
If you are new to the meta, start with the Self-Care-Free Healer and Pilgrim 2.0. If you are experienced and queuing with friends, run Gen-Rush God and Boon Squad. If you are experienced and queuing solo, run Sprint Demon and Team Aura Reader. None of these builds are wrong. The 10.2.0 PTB has finally given Dead by Daylight a Survivor meta where every perk slot can be a real choice.